Manuals - Climbing frame Faber
Building parts - how to create your projects, instructions for the basic buildings
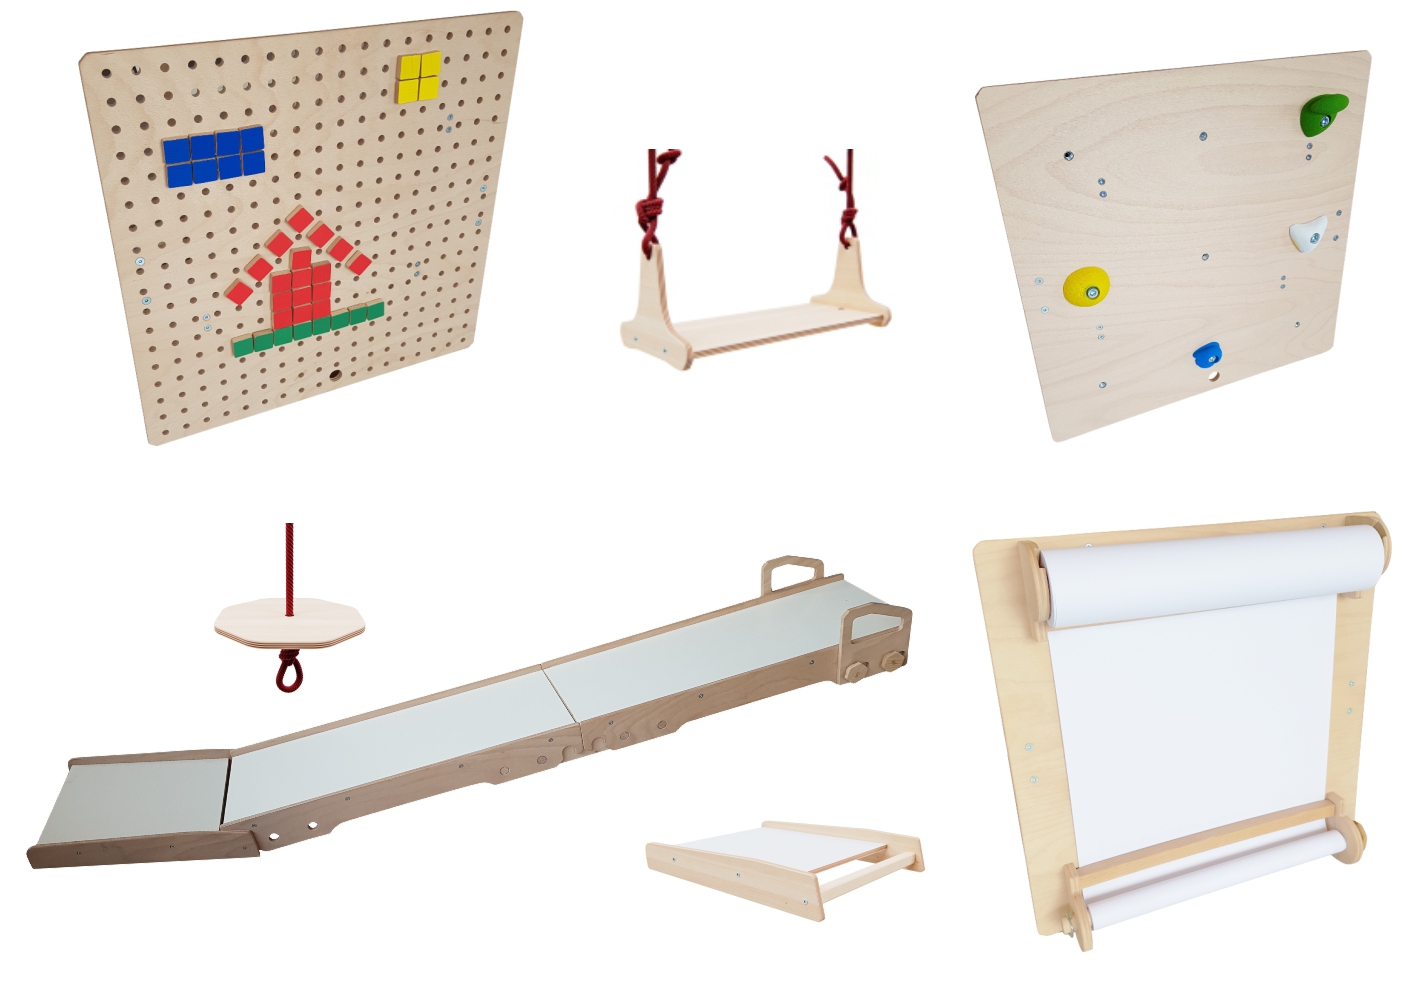
Accessories - balance boards, inclined plane, climbing board, whiteboard, plug and play board, endless paper
Load bearing capacity and stability
General information and warnings
User Manual PDF - Download here
What is climbing frame Faber
Faber climbing frames are a variable gym for the whole family. You can build many different climbing structures (buildings) inside your house or in the apartment or in the garden. Faber grows with your children. Gradually, you can expand your set of parts with additional parts and accessories, according to the current needs of the family. You can enhance the climbing frames with accessories: balance boards, inclined planes and other elements.
Faber can be split as follows:
1. Building parts, to build bare structures/projects:

2. Accessories, that can enrich the bare structures with various elements:
Building parts
How to build a construction
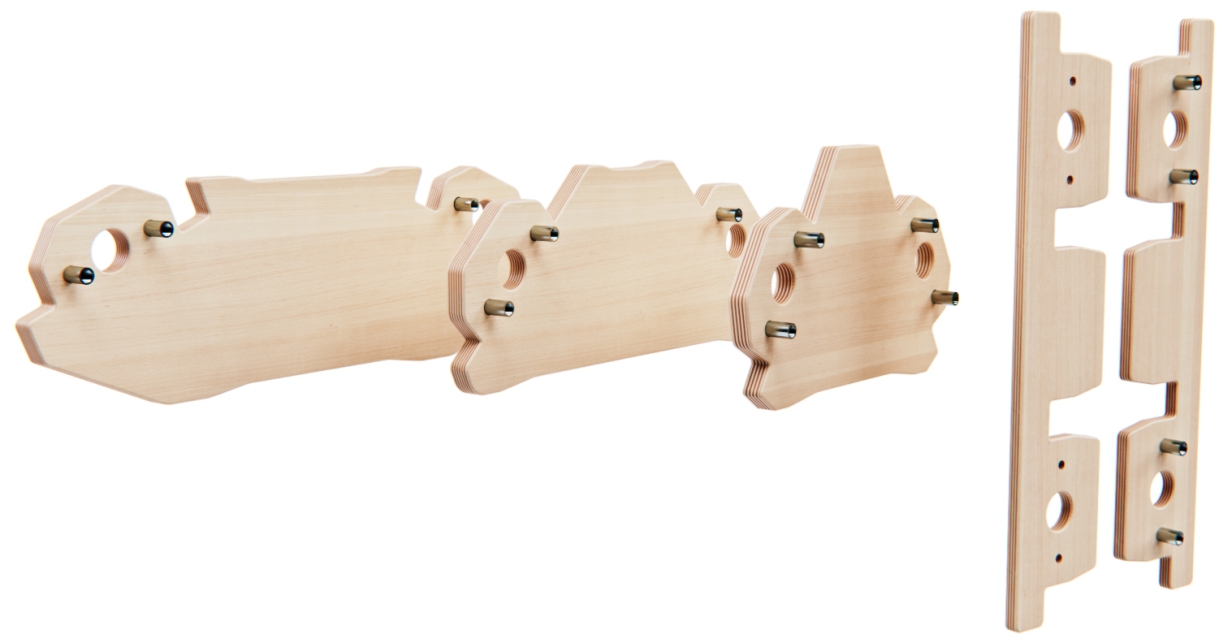
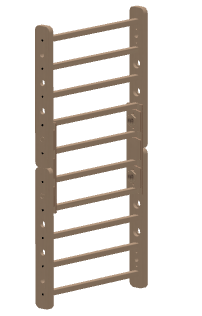
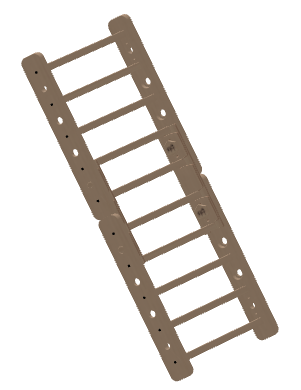
The basic building component of the Faber climbing frames is the Panel.
Panel description:
A - threaded holes for direct mounting of the bolt,
B - holes without thread for mounting with bolt and washer,
C - holes for reinforcing pin set
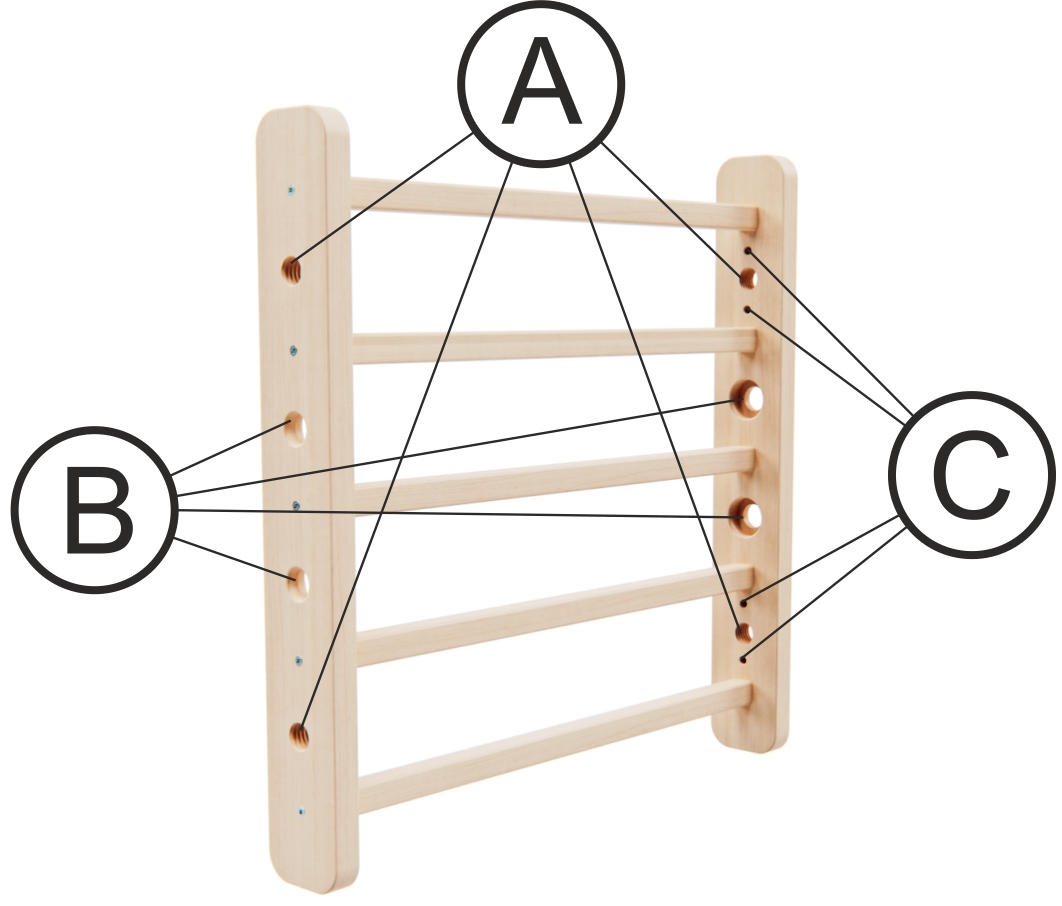
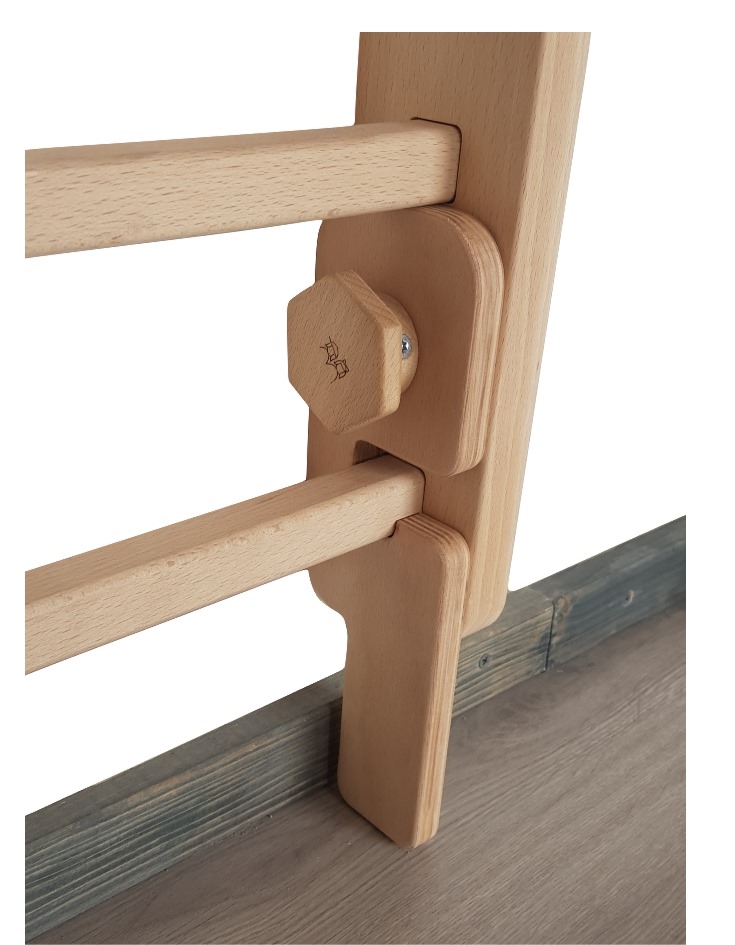
It has a total of four screw holes at the ends. These threaded holes serve to fasten the connectors. Only bolts without washers are sufficient for this connection. Insert the connector from the inside of the panel as well as the bolts for fastening the connector, as shown below:
Into the threaded holes goes:
bolt  connector T1
  , T2
, T2  , T3
, T3  and E1
  Attention this connector consists of two counterparts. Never use only one part of this connector!!!
Here you can see how the E1 connector is installed:
You can find the video instructions here:
E1 connector connects two panels together (above each other). One connector consist two parts. To connect two panels you will need one pair of E1 connectors.
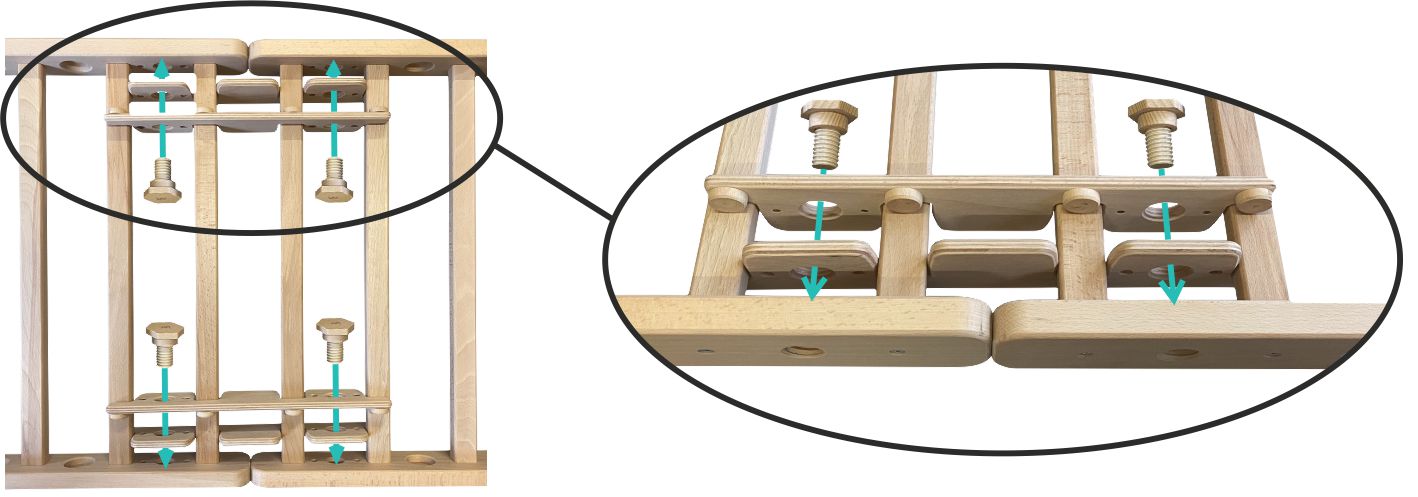
You can reinforce all joints made with these connectors with a set of pins  . They eliminate clearances at the joint and prevent the bolt thread from squeezing under long-term and high joint loads. Here are how to install the connectors with a set of pins:
ATTENTION: It is not mandatory to use pins, those are rarely used/required.
Wherever the gap between two panels is bigger than 89 mm you must use wooden rod with cotters. The rod is inserted to any of T1, T2 or T3 connector.

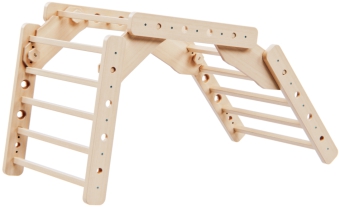
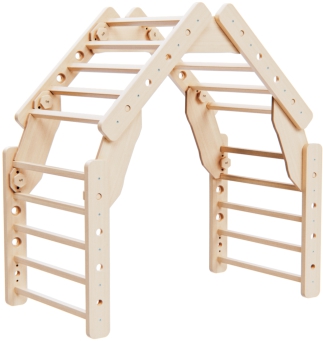
When combining those connectors with Faber panels you can build following projects:

Basic constructions can be expanded and connected in various ways. This is done by the four holes located in the middle of the panel. The holes are thread-less and are used to connect panels side by side, or are for corner C1 connector. 
You need both bolts and nuts to make such connections.

The panels or the buildings themselves can be interconnected with stainless steel rods  , which can also be installed into the holes without a thread using a nut on each side. The stainless steel rod basically replaces the panel.
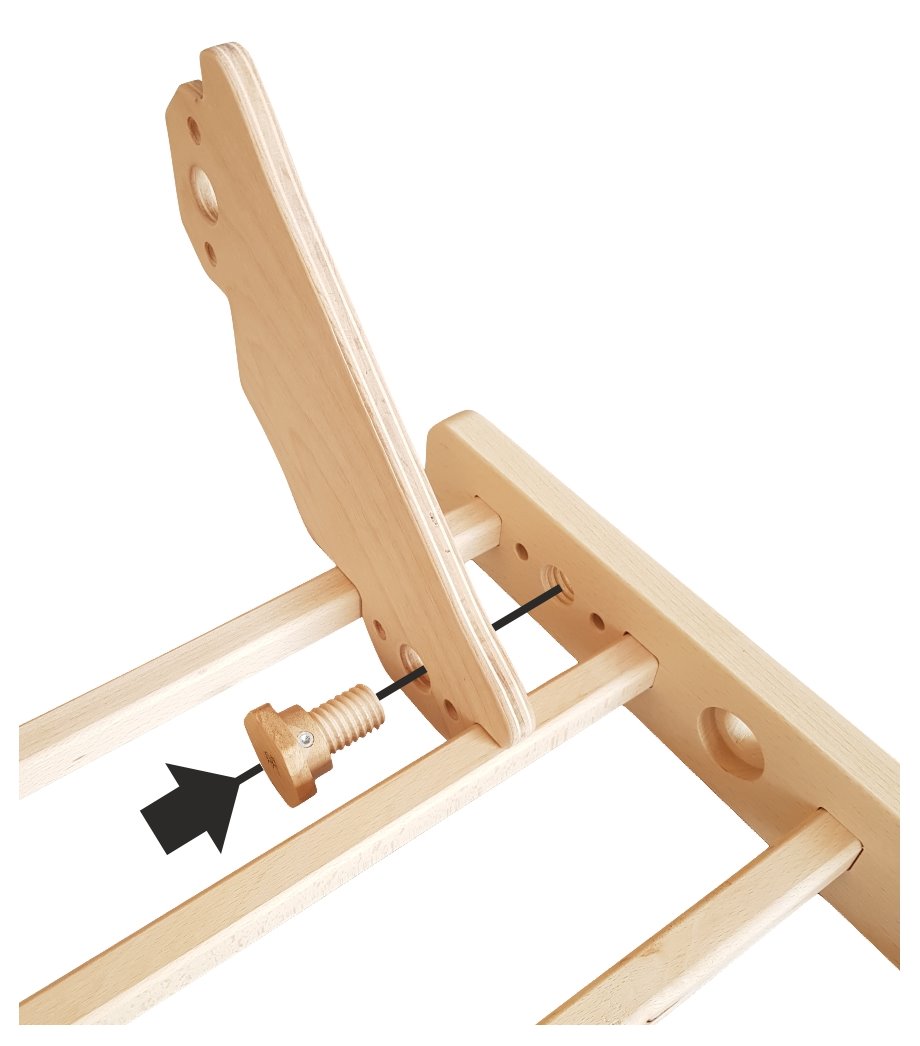
Some more complex constructions require overlapping of two connectors. For example, T2 over E1, or E1 over H1 and other combinations. In these cases you will need a wooden bolt 50 
On the below picture is shown how the overlapping of two connectors is done: A - bolt 35, B - bolts 50, C - washer  .
.

Other construction parts
S1 connector  serves to erect only one panel in open space. You will need 2 x bolts 35, 2 x bolts 50 and 2 x nut to install these connectors on the panel. To tilt the panel, just loosen 2x bolts 35. While in use, all screws and nuts must be always tight.
F1 connector  deal with floor plinth.
H1 connector  reinforces trapeze.
With W1 wall connector  you can attach buildings to the wall with the speed of light.
W1 connector assembly
You can find the video instructions here:
First of all you need to find out what material is the wall on which you plan to install the Faber made of.
Based on this you can choose one of three types of wall mounting kits for W1 connector in our eShop:
for wood  for brick
  for plasterboard
If you have a problem attaching objects with similar wall plugs to your walls, or want to mount Faber climbing frame, for example, on the wall that has been insulated with polystyrene, take the W1 connector and consult your nearest specialist shop for fasteners or consult your dealer in every good hardware store.
If you are installing 2 pieces of W1 connector side by side for only one panel, please make sure you keep 13 cm between the inner part of the panel and the edge of the W1 connector as shown on the picture below:
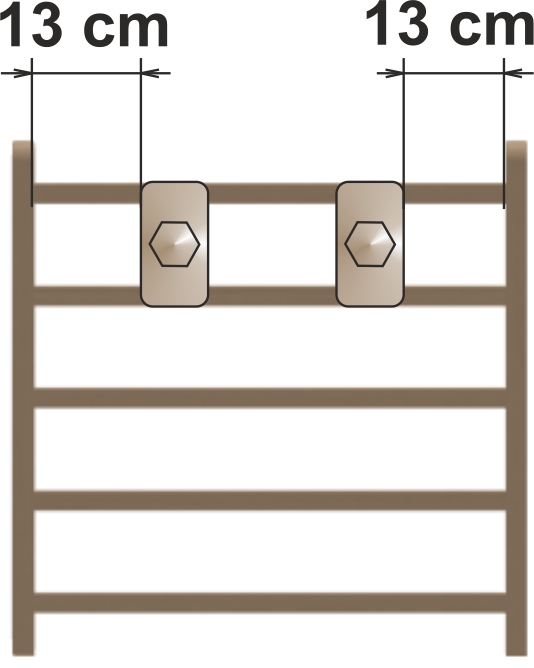
If you do not follow this recommendation, you will limit the options/accessories to be installed on the panel.
For buildings on the wall, we recommend 2 pcs of W1 connector (up) and 1 pce (down) as shown on the picture below:


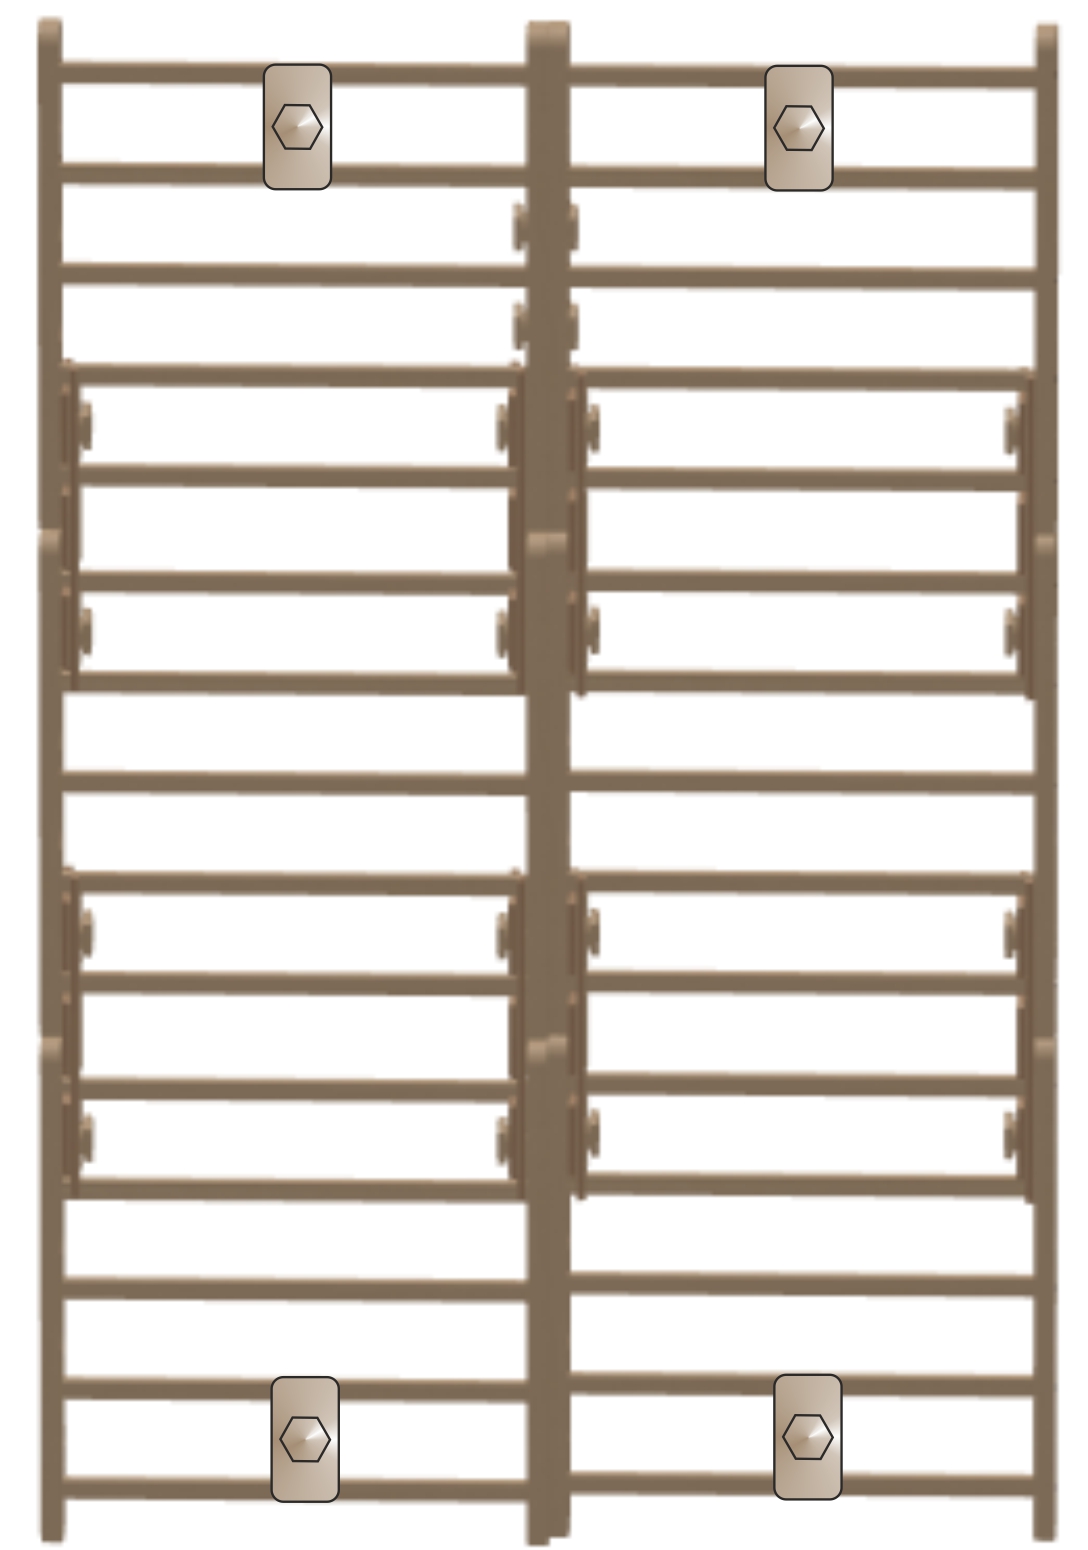
For big four-panel constructions, we recommend placing W1 connectors as shown below:

For constructions connected to each other we recommend to place W1 connectors as shown below:
If you are not sure how or where to place W1 connectors in the best possible way for your construction, send us an email, we will be happy to help.

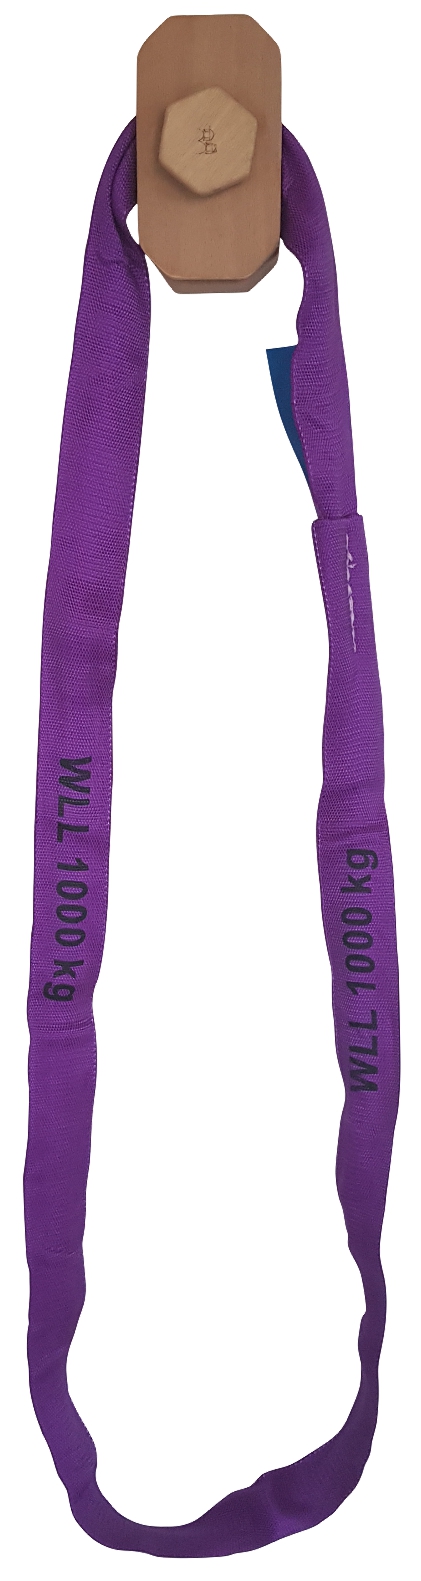
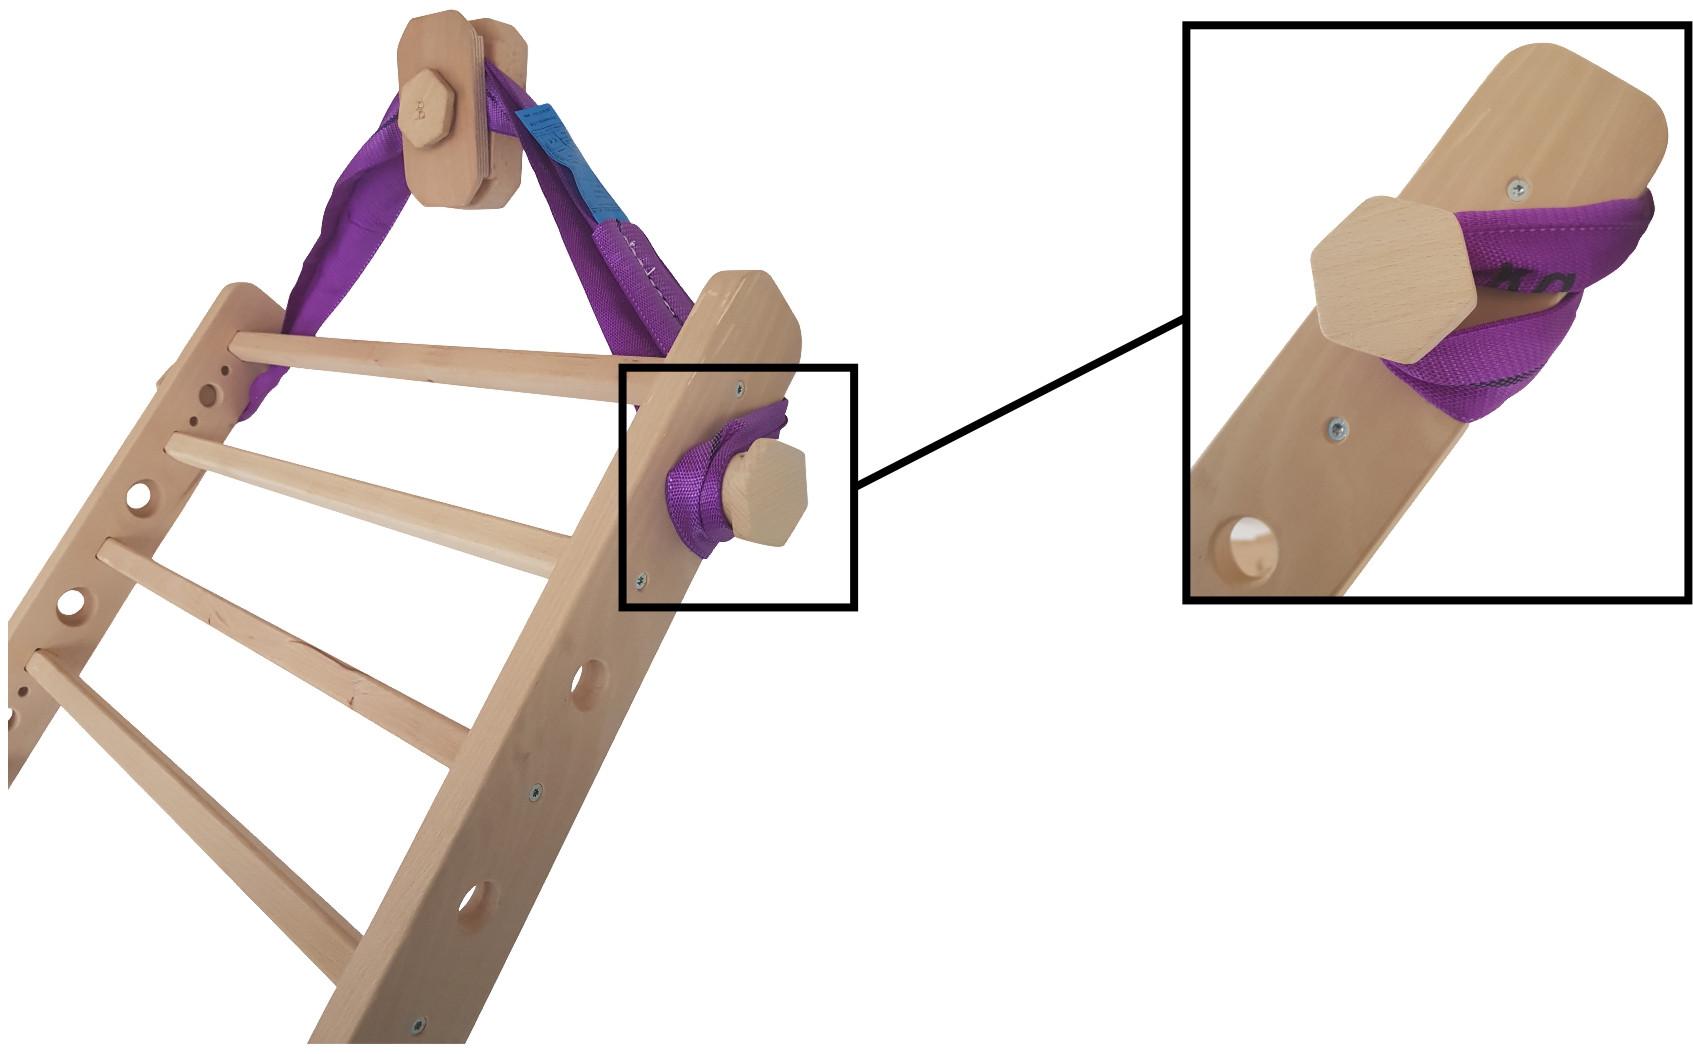
The strength strap  is used to tilt two, three or four panels connected by E1 connectors at an angle to the wall. On the wall, the strength strap hooks into the W1 connector, which must always be tightened to fix strength strap as tight as possible. On the side of the panel, the strength strap is hooked into the bolts 50, which must be screwed 2 to 2.5 cm into the thread in the panel.
The first option is to tie the strap "full-length", as shown on the pictures:
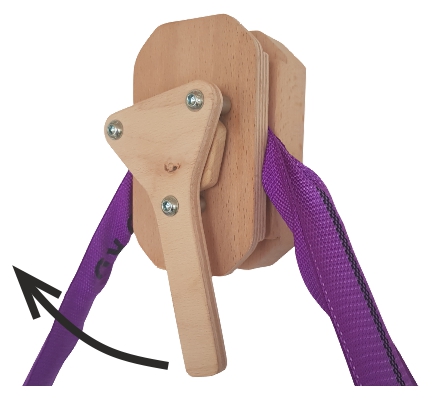
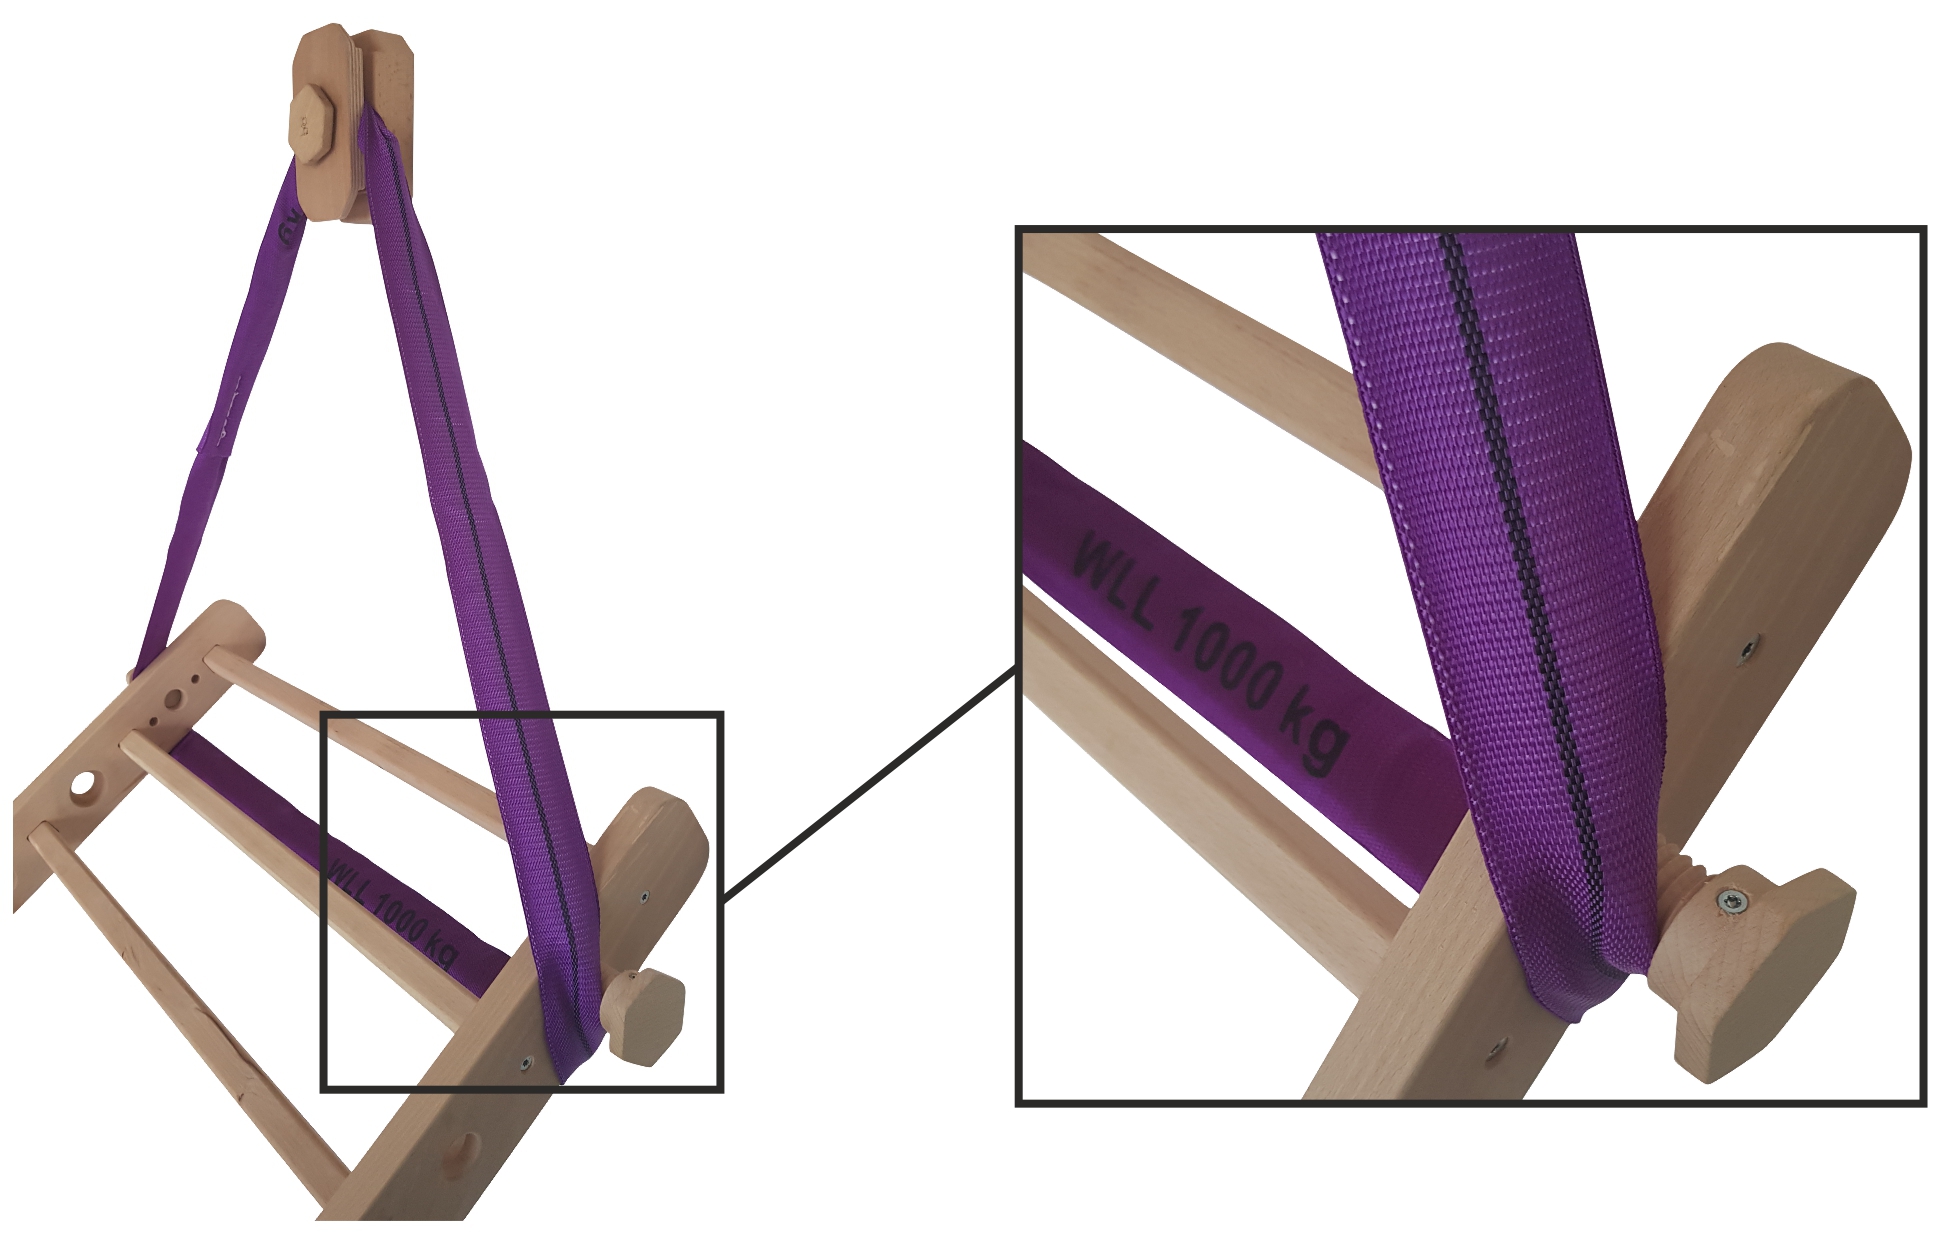
The second option is to tie the strap "half-length", as shown on the pictures:

For easy tightening and loosening of bolts or nuts you will need a wooden key  . Tighten the bolts with gentle over-pressure. In most cases you can tight the bolts by hand but to loose the bolt you will need a key.
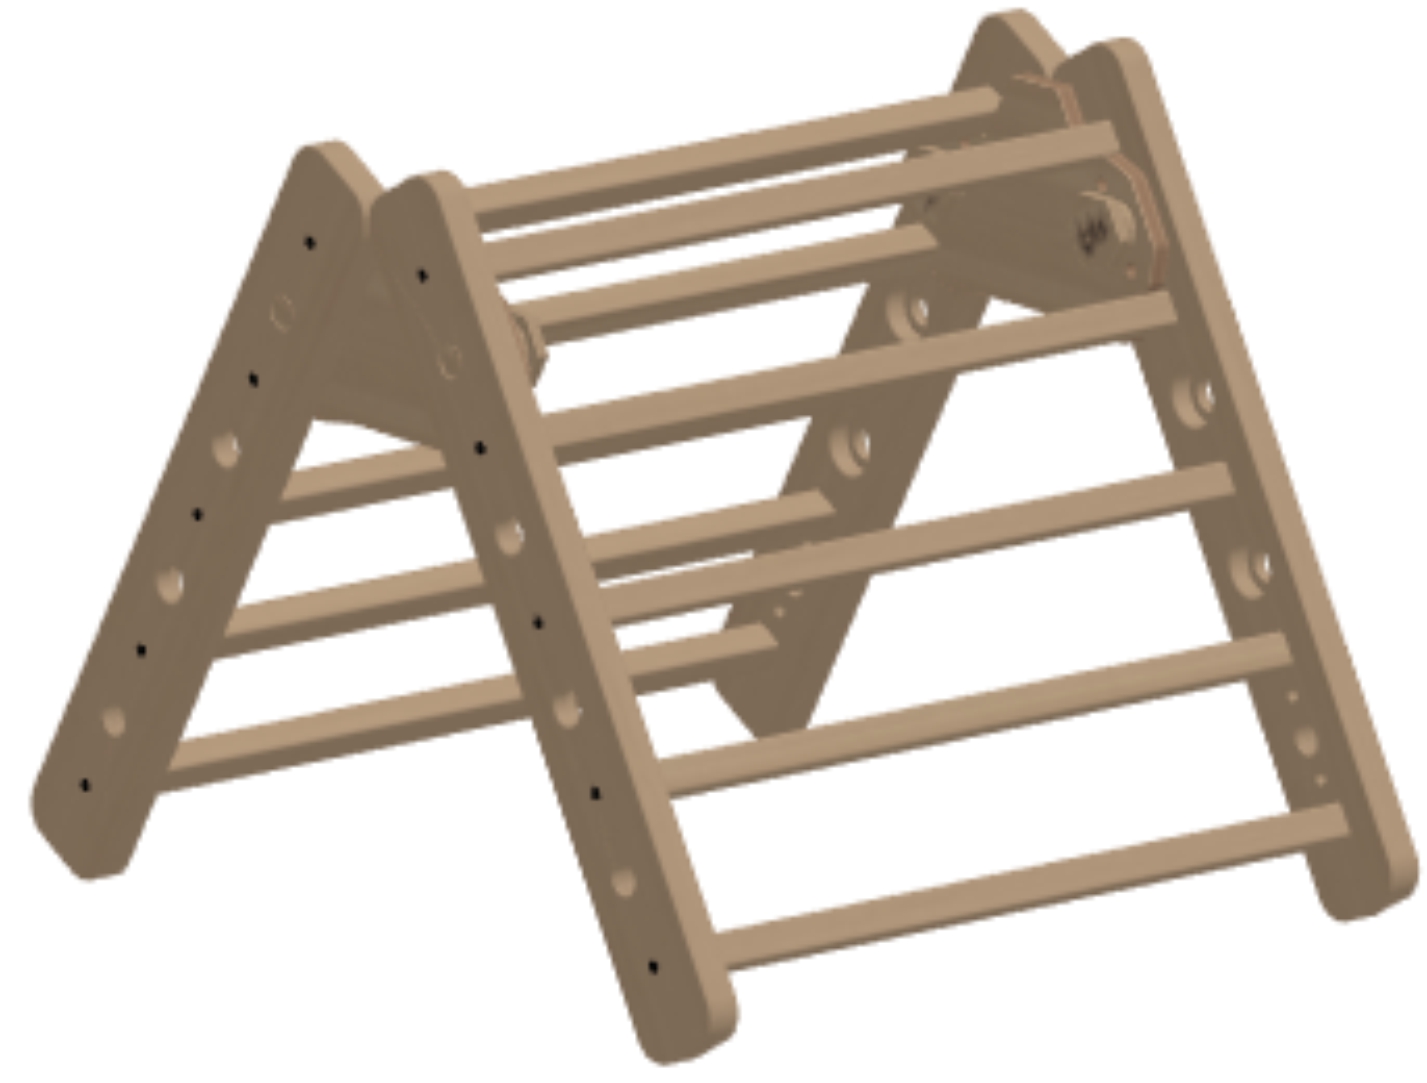
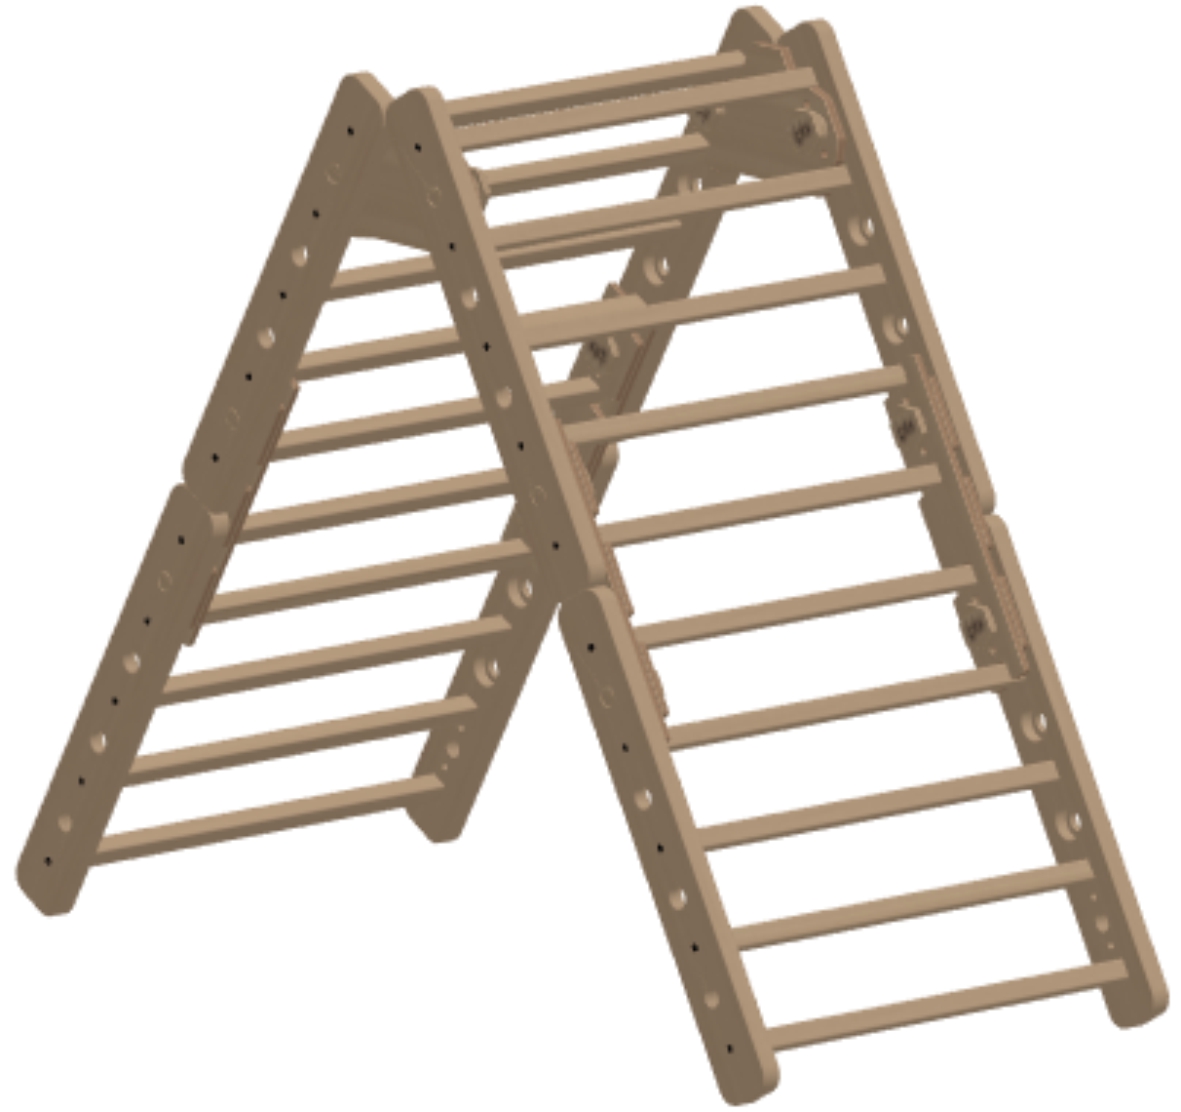
Instructions of basic constructions
Pikler triangle - small
List of building parts: 1 x panel, 2 x T1, 4 x bolt 35
Load bearing capacity: 180 kg
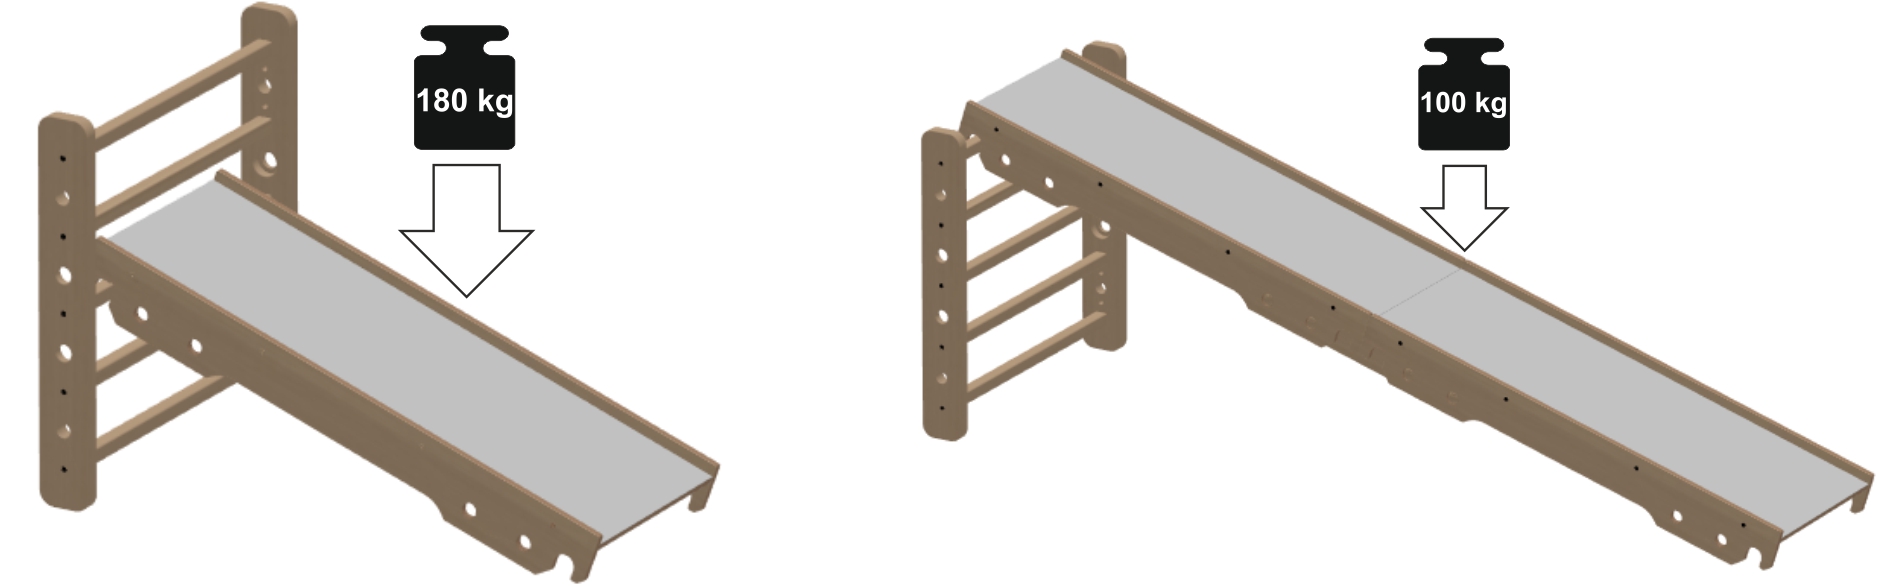
Pikler triangle - medium
List of building parts: 4 x panel, 2 x T1, 4 x E1, 12 x bolt 35
Load bearing capacity: 100 kg
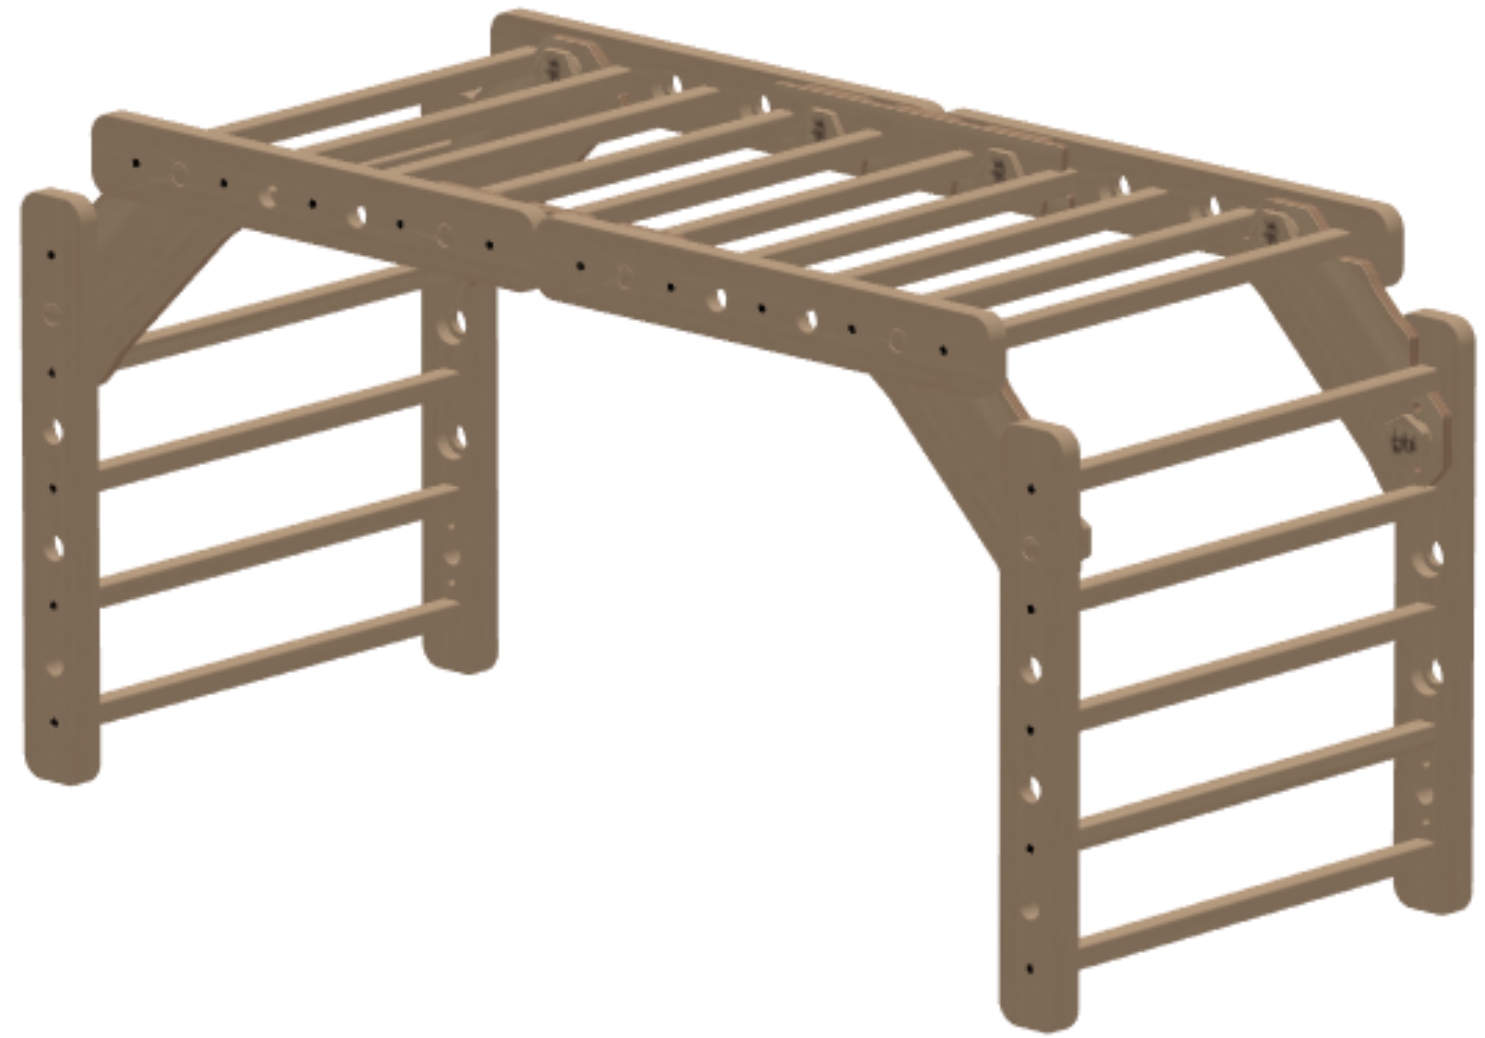
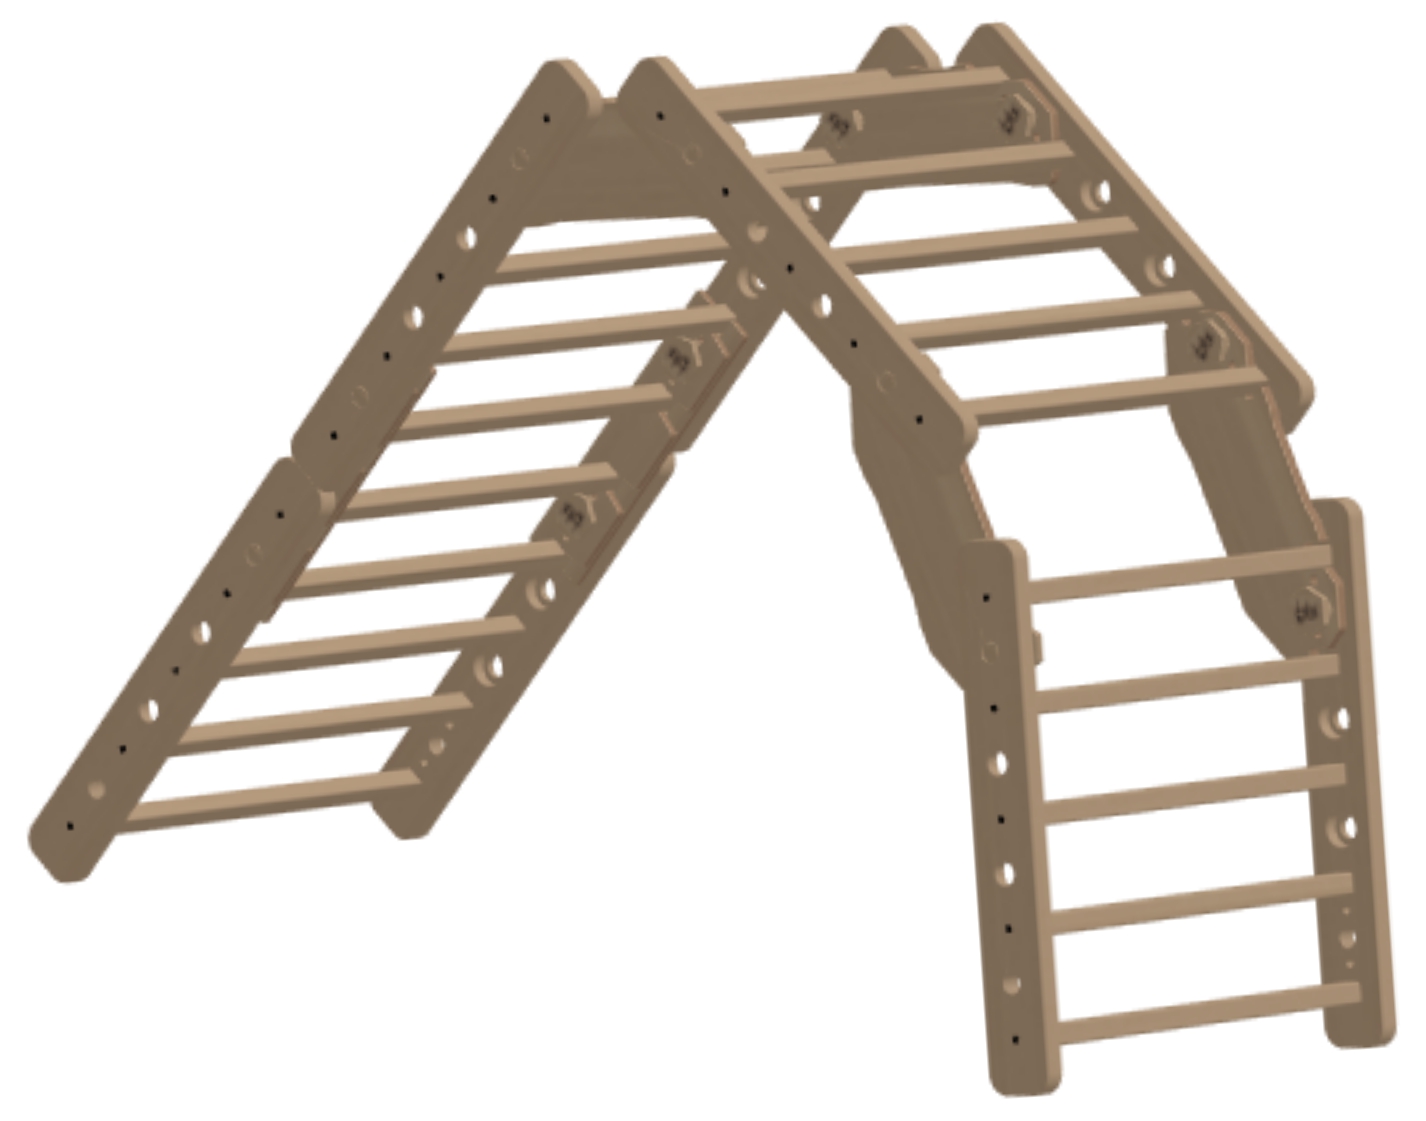
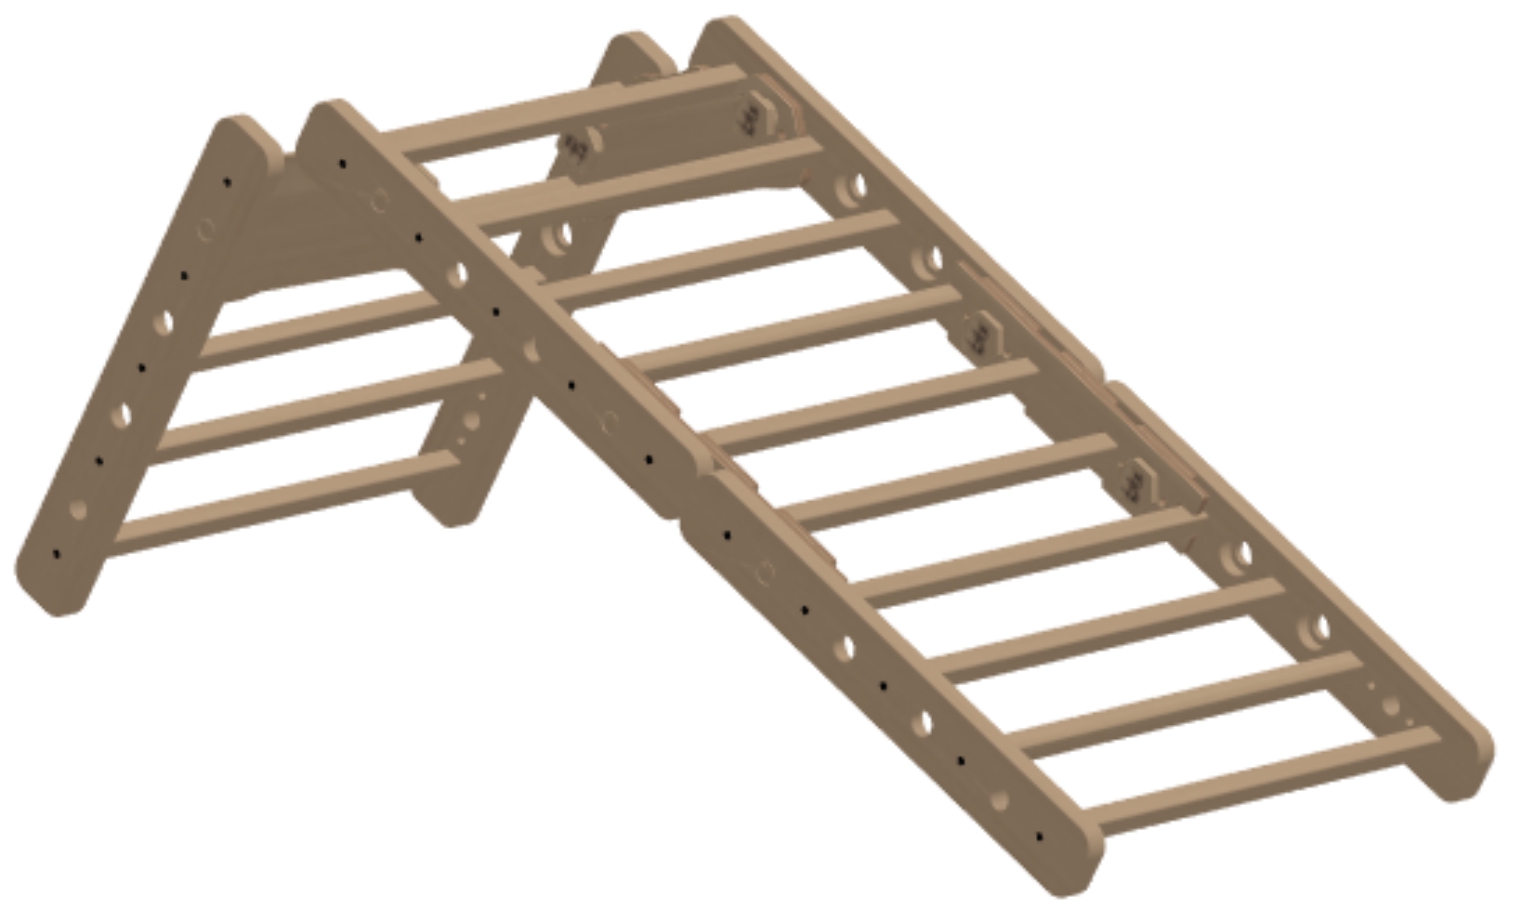
Bridge - small
List of building parts: 3 x panel, 4 x T2, 8 x bolt 35
Load bearing capacity: 200 kg
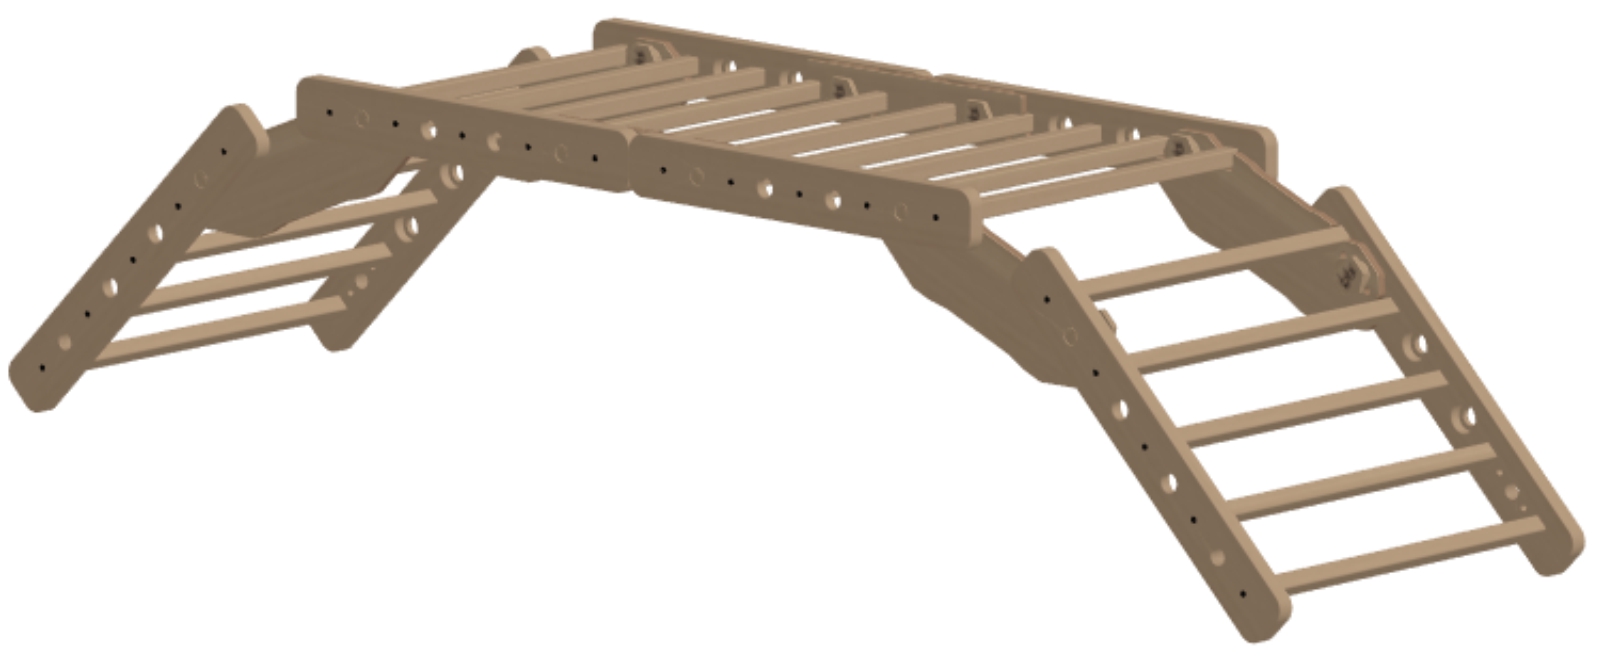
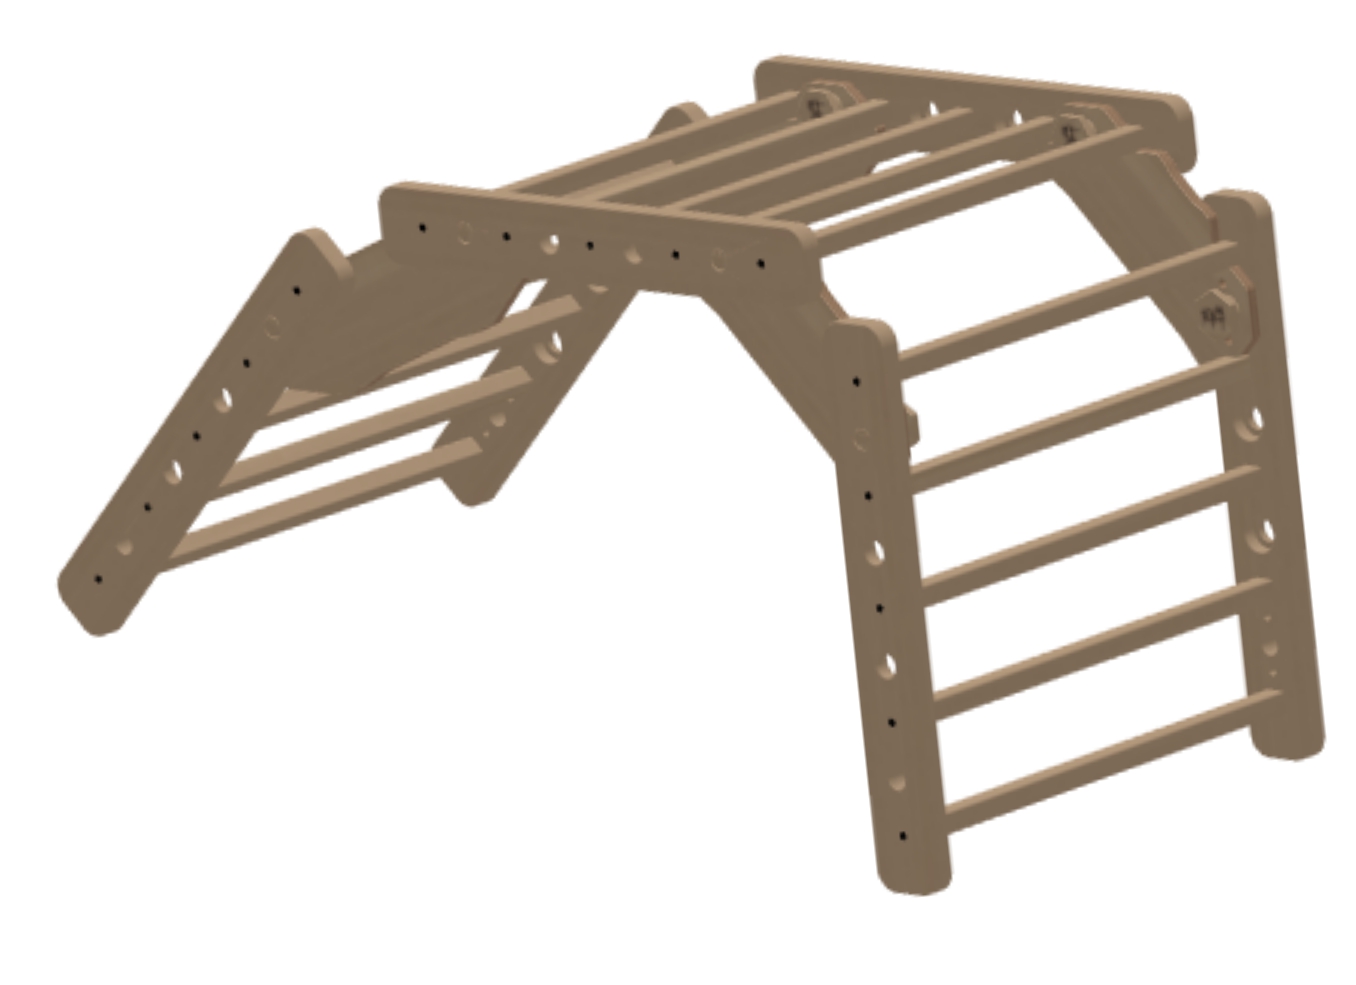
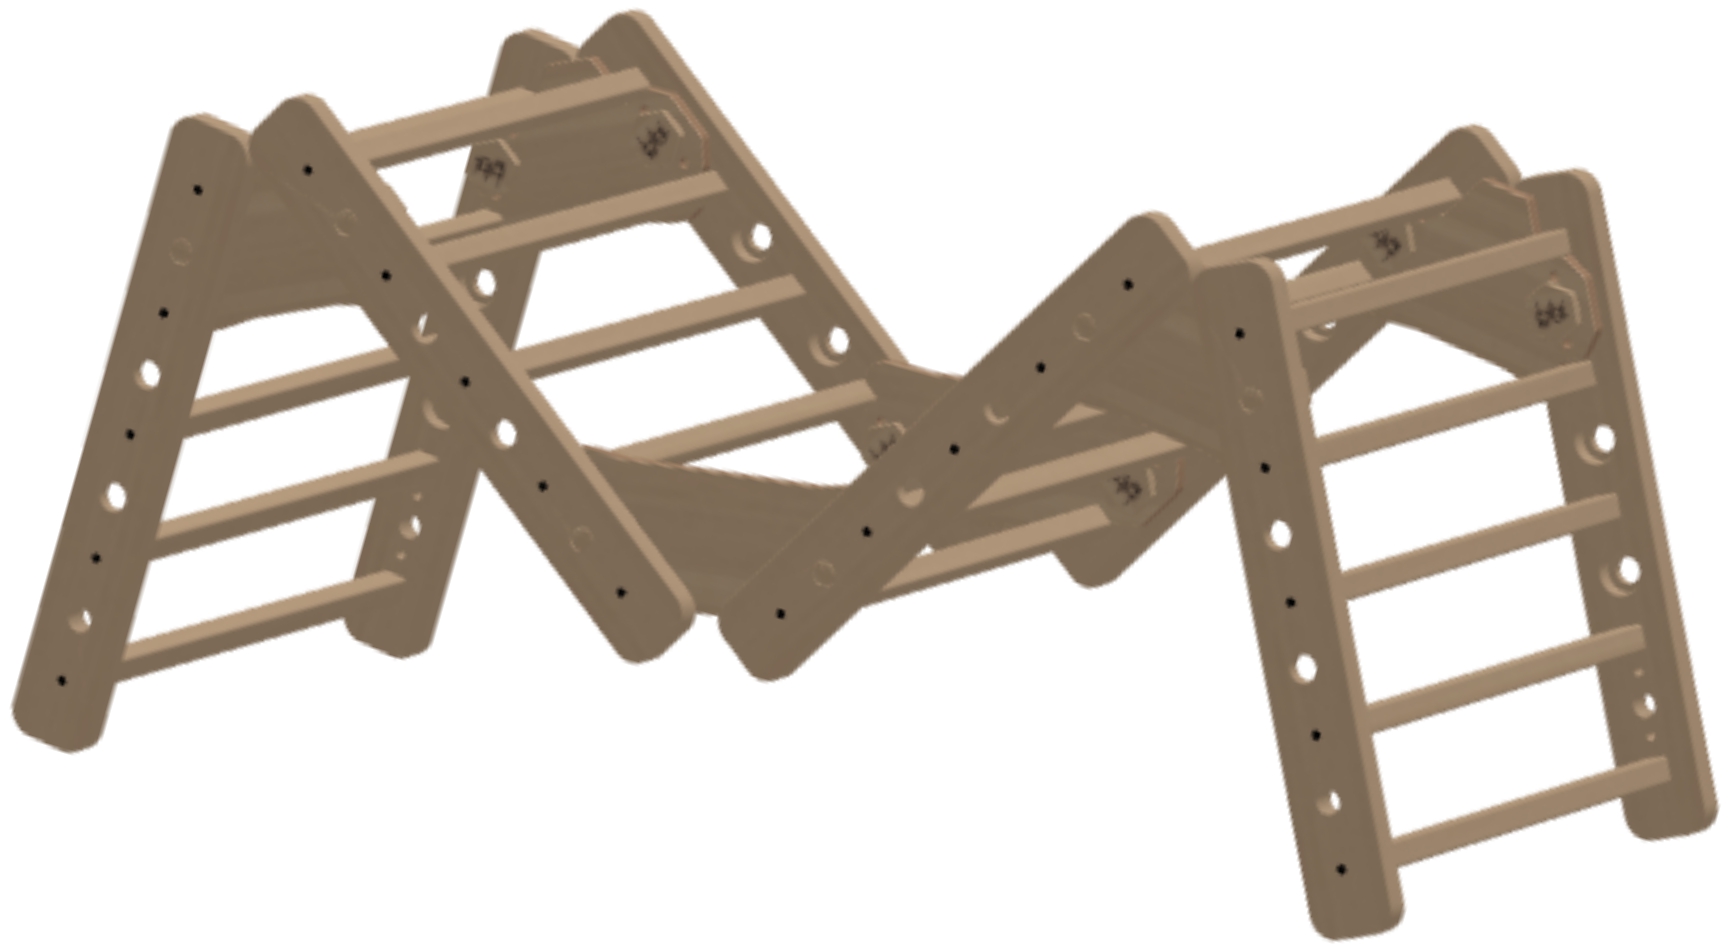
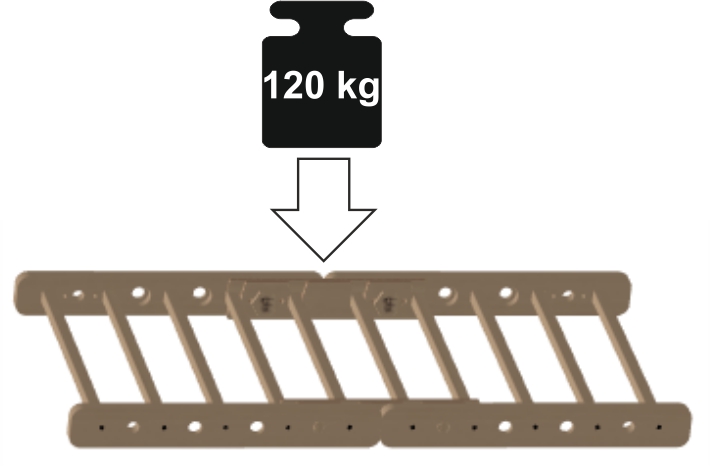
Bridge - medium
List of building parts: 4 x panel, 4 x T2, 2 x E1, 12 x bolt 35
Load bearing capacity: 120 kg
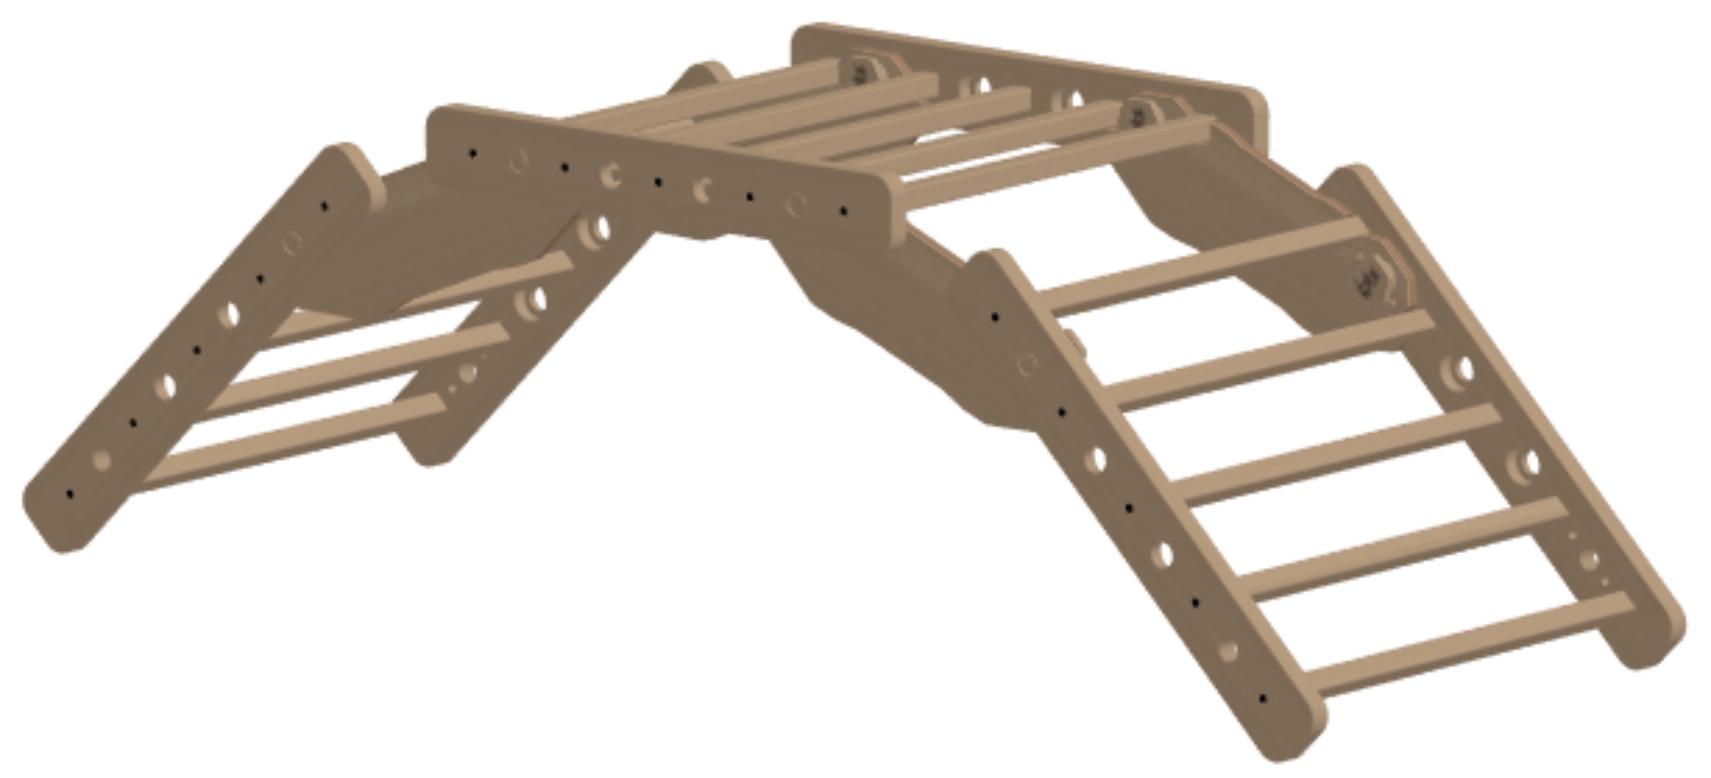
Horse - small
List of building parts: 3 x panel, 4 x T3, 8 x bolt 35
Load bearing capacity: 80 kg
Horse - medium
List of building parts: 4 x panel, 4 x T3, 2 x E1, 12 x bolt 35
Load bearing capacity: 80 kg
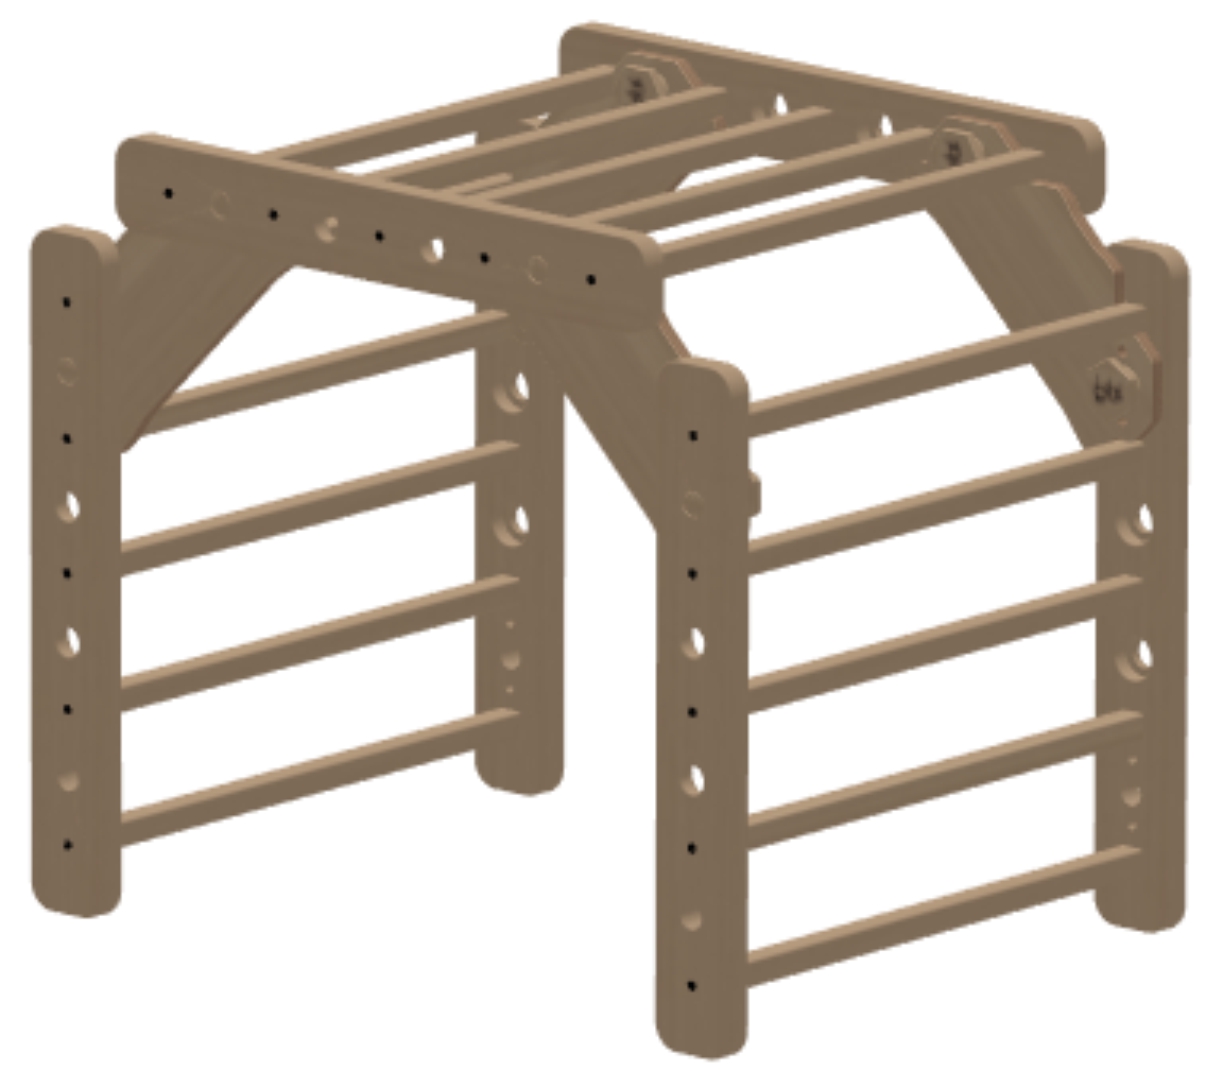
House - small
List of building parts: 4 x panel, 4 x T3, 2 x T2, 12 x bolt 35
Load bearing capacity: 120 kg
Dancing house - small
List of building parts: 4 x panel, 2 x T2, 2 x T3, 2 x E1 12 x bolt 35
Load bearing capacity: 100 kg
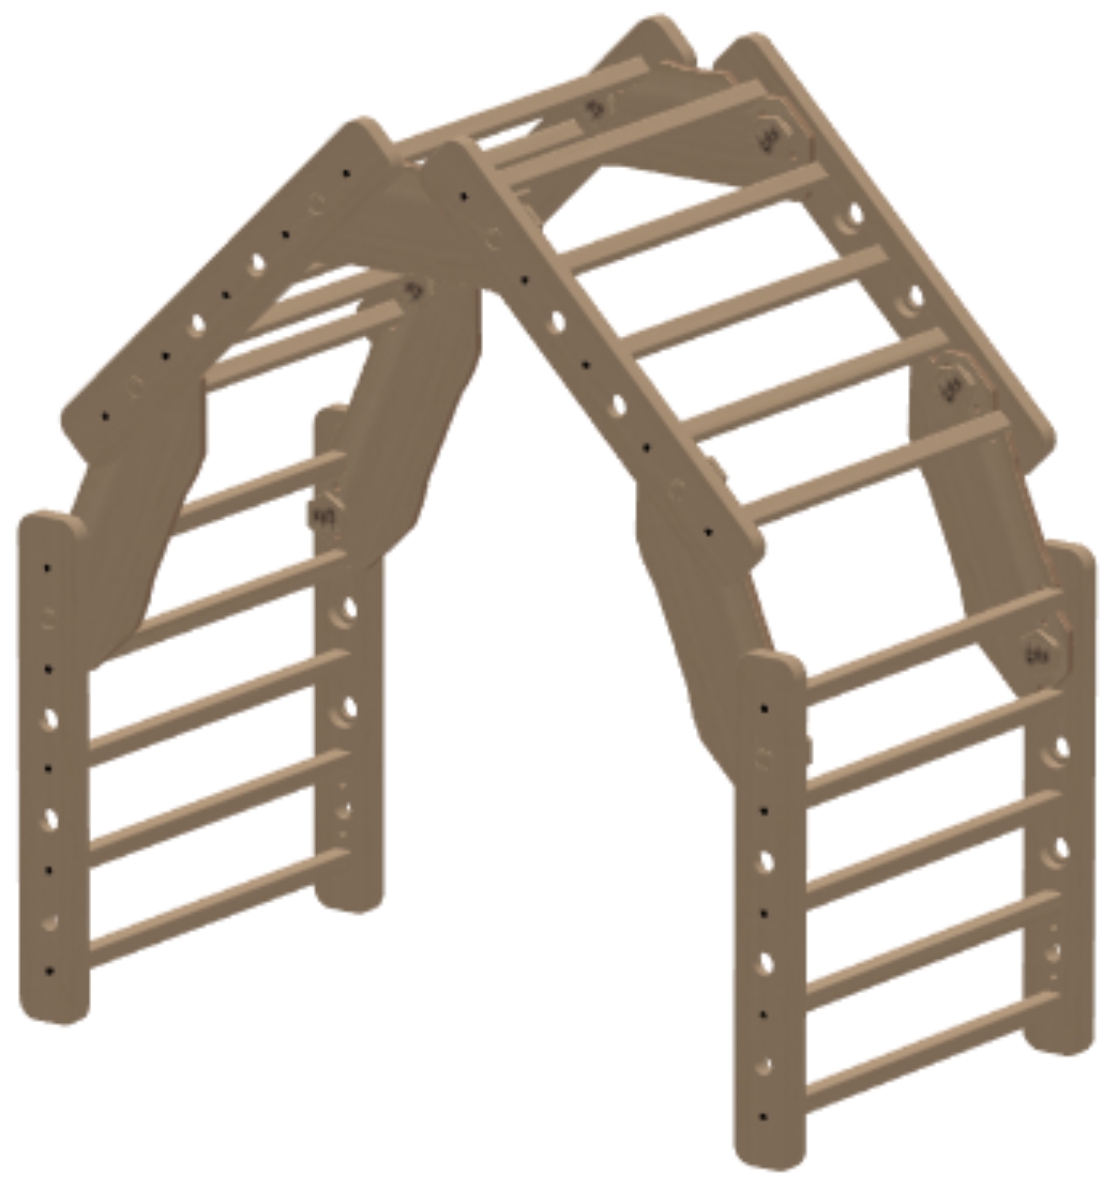
Mountain - small
List of building parts: 4 x panel, 6 x T3, 12 x bolt 35
Load bearing capacity: 80 kg

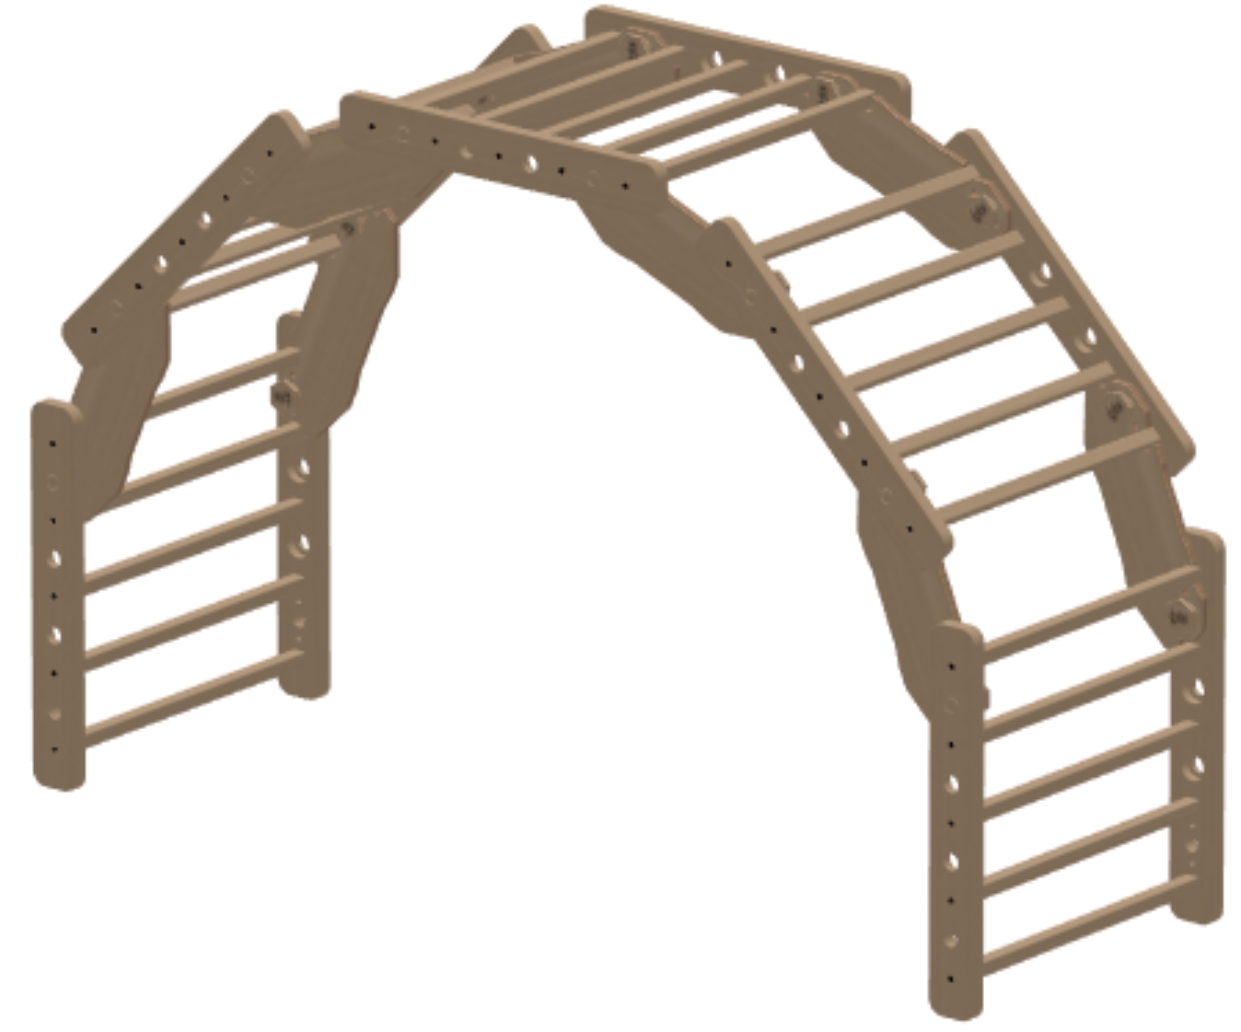
Mountain - medium
List of building parts: 5 x panel, 8 x T3, 16 x bolt 35
Load bearing capacity: 80 kg
Panther - small
List of building parts: 3x panel, 2 x T2, 2 x T3, 8 x bolt 35
Load bearing capacity: 100 kg
Lucky devil (push ups) - small
List of building parts: 3 x panel, 2 x T2, 2 x E1, 8 x bolt 35
Load bearing capacity: 100 kg
Spider - small
List of building parts: 4 x panel, 4 x T1, 2 x T2, 12 x bolt 35
Load bearing capacity: 100 kg
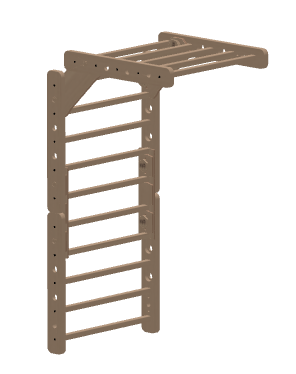
Wall bars - small
List of building parts: 2 x panel, 2 x E1, 1 x W1, 4 x bolt 35
Load bearing capacity: 150 kg
Wall bars (tilted) - small
List of building parts: 2 x panel, 2 x E1, 1 x W1, 4x bolt 35, 2 x bolt 50, 1 x strength strap
Load bearing capacity: 120 kg
Wall bars with T2 trapeze - small
List of building parts: 3 x panel, 2 x T2, 2 x E1, 3 x W1, 8x bolt 35
Load bearing capacity of trapeze without H1 brace is only 15 kg!!!
Load bearing capacity of trapeze with H1 brace: 70 kg
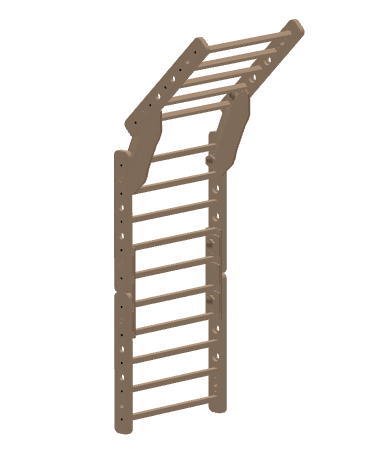
Wall bars with T3 trapeze - small
List of building parts: 3 x panel, 2 x T3, 2 x E1, 3 x W1, 8x bolt 35
Load bearing capacity of trapeze without H1 brace is only 15 kg!!!
Load bearing capacity of trapeze with H1 brace: 70 kg
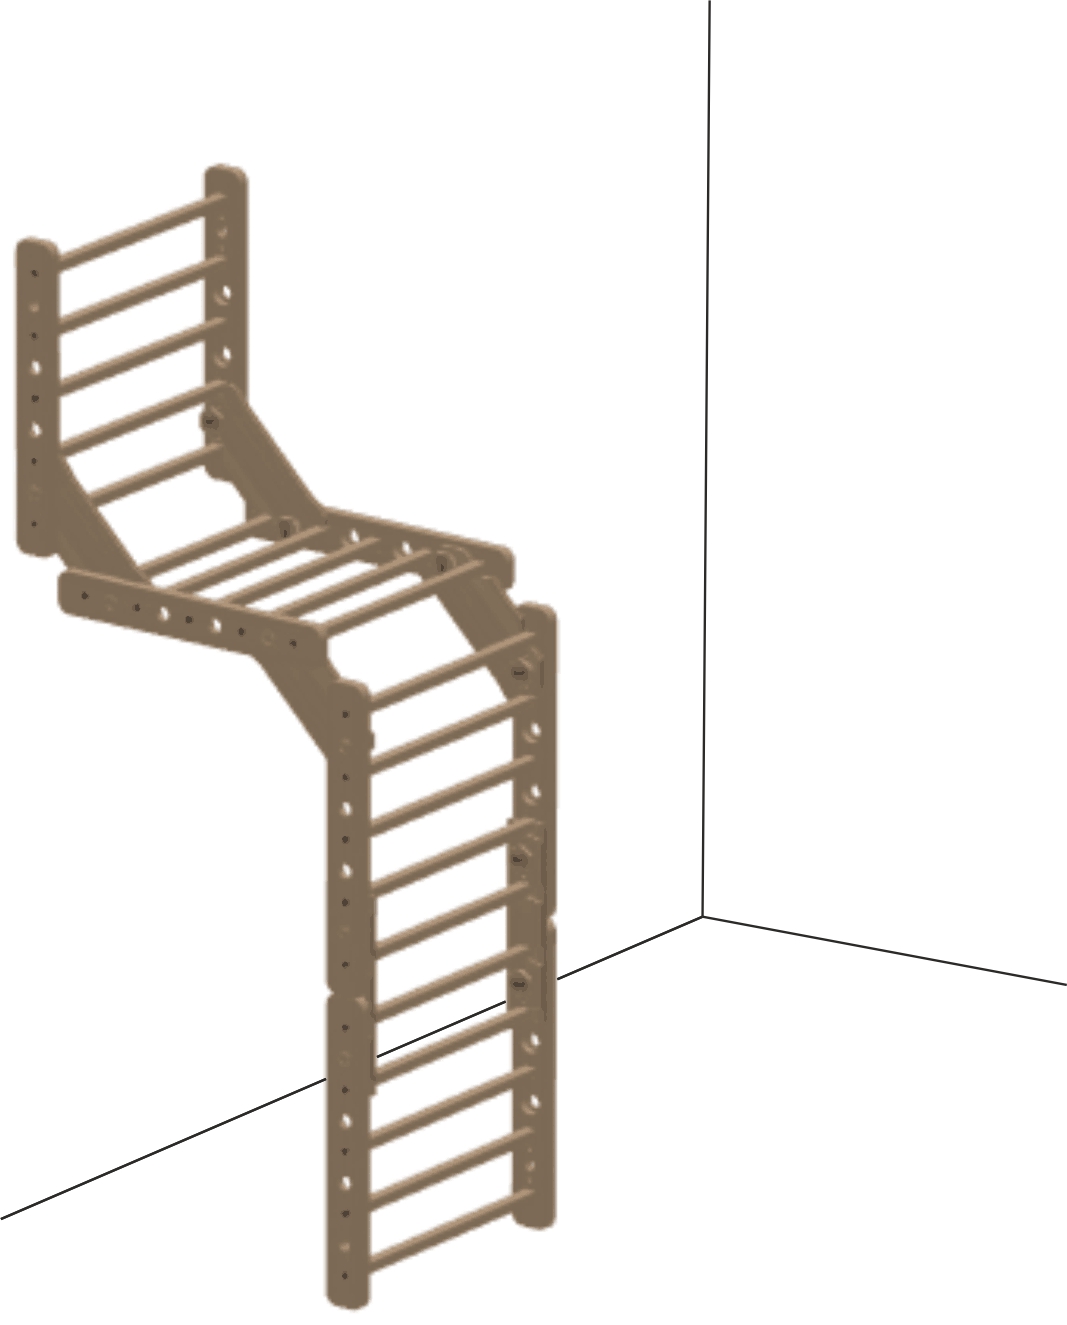
Cliff - small
List of building parts: 4 x panel, 4 x T2, 2 x E1, 2 x W1, 12x bolt 35
Load bearing capacity: 120 kg
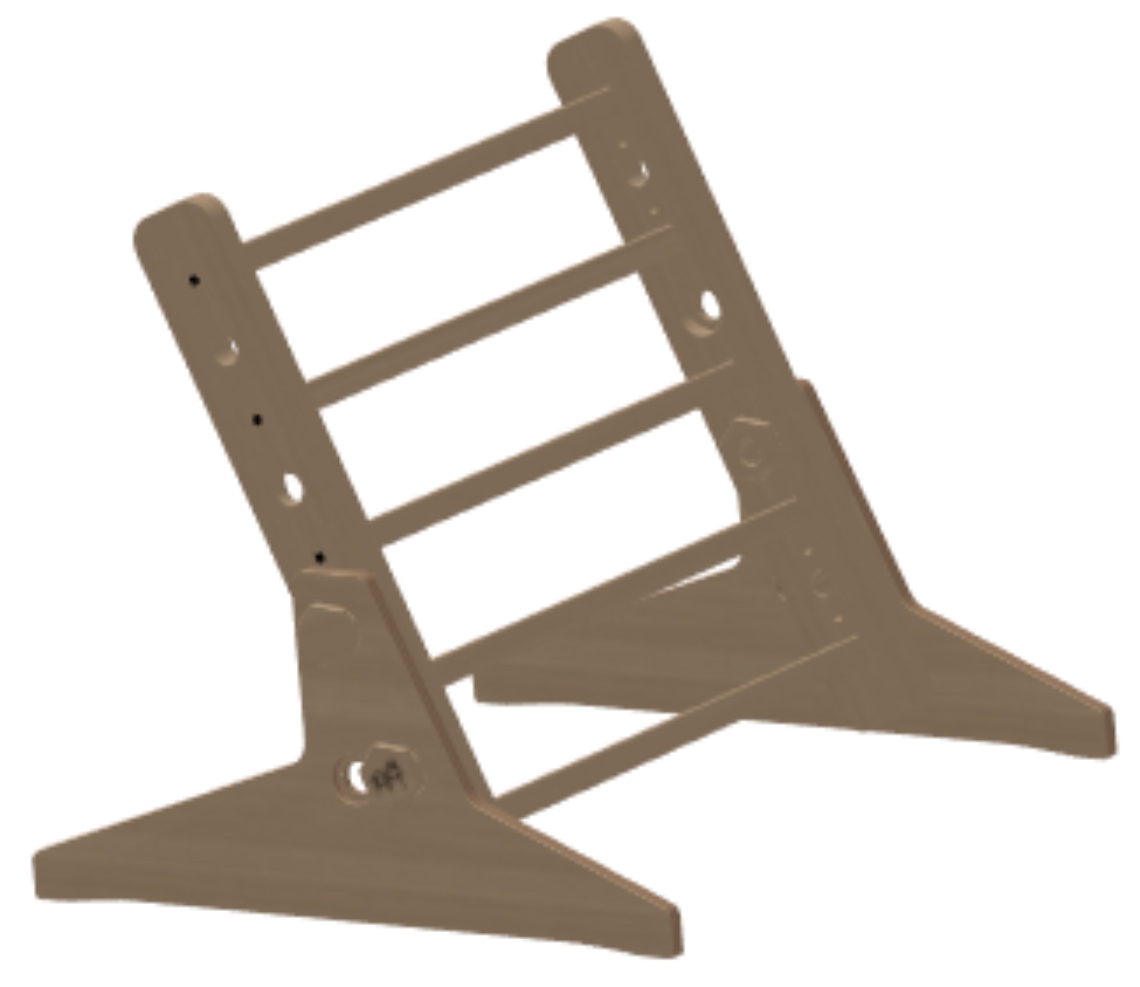
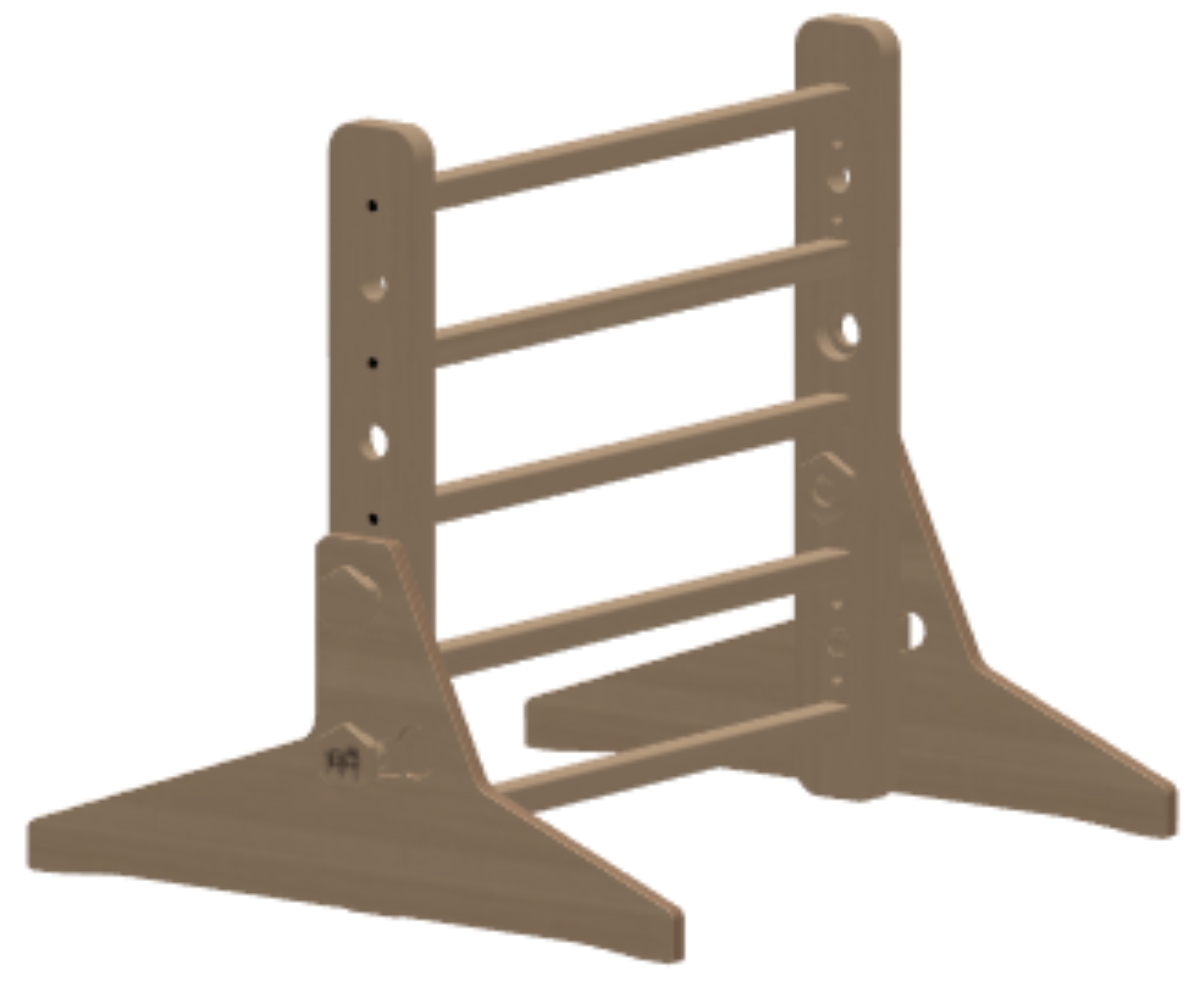
Panel in open space - small
List of building parts: 1 x panel, 1 x S1, 2 x nut 4 x bolt 35
Load bearing capacity: 120 kg
Accessories
Add some accessories to quickly and easily enhance your projects.
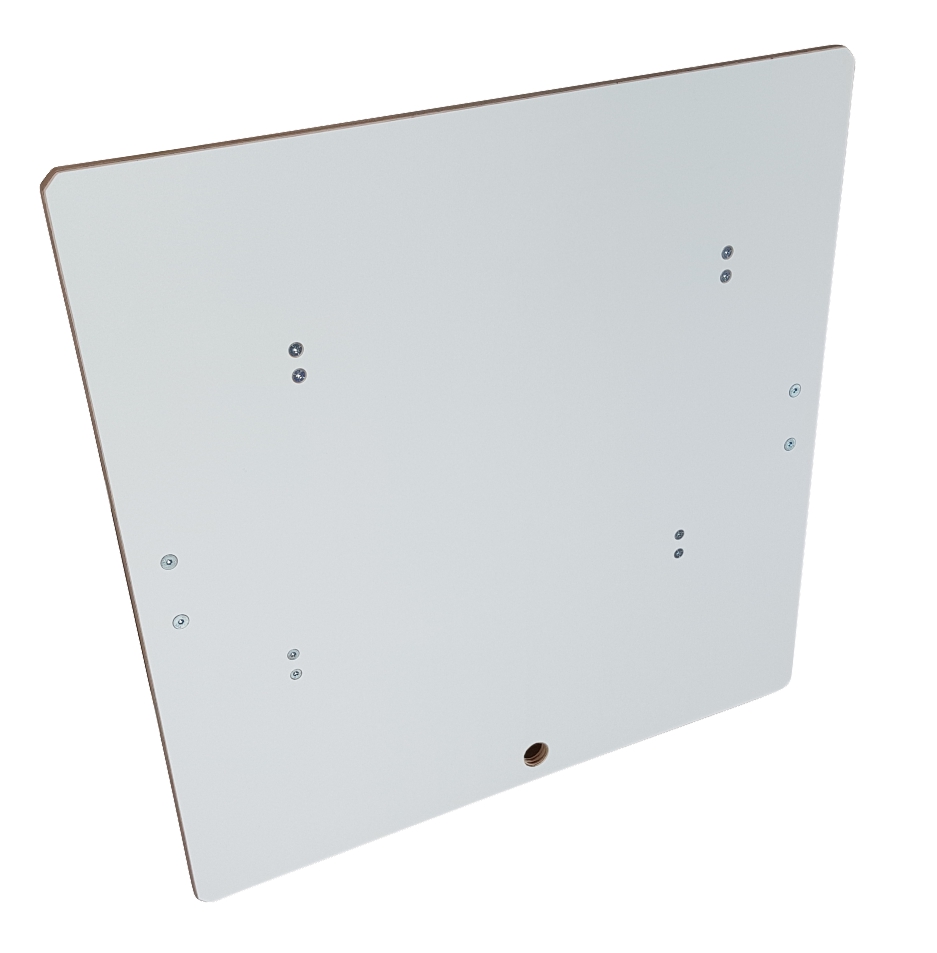
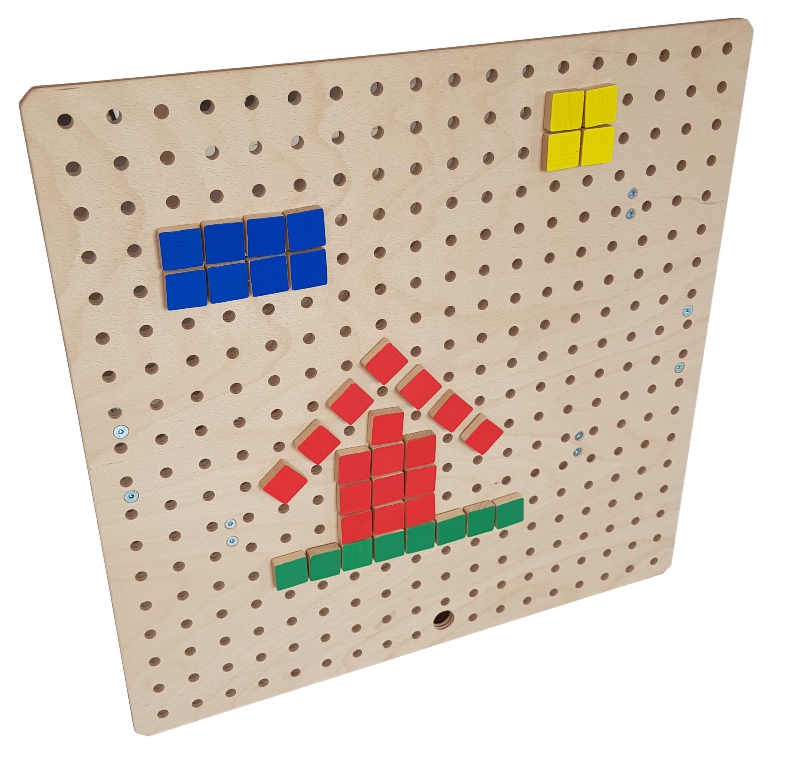
For example a climbing board, whiteboard, plug and play board or an endless paper can be attached to each panel with a blink of an eye.
Plug and play board must be place in a way when the top line is no higher than 100 cm from the floor.
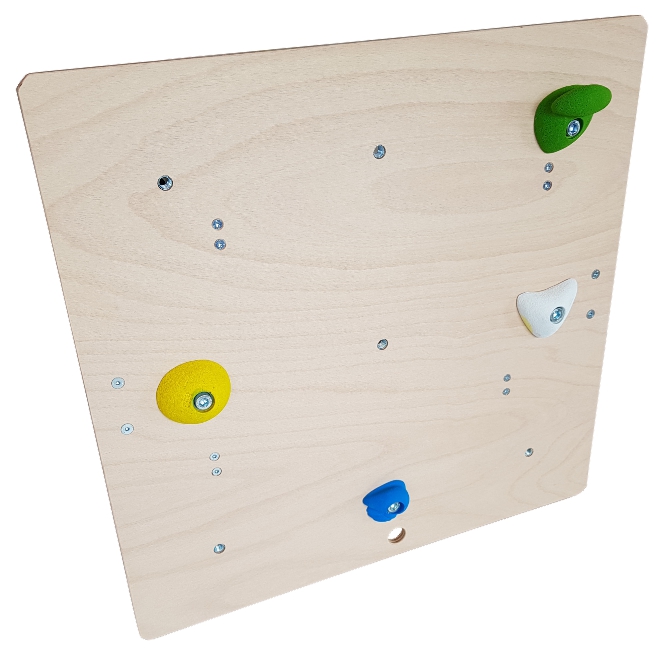
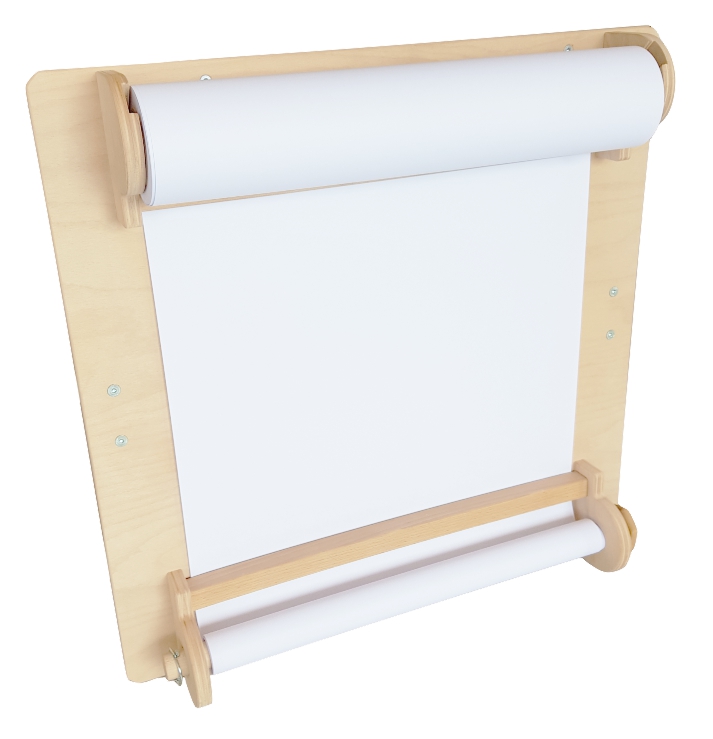
Climbing board - for safety reasons, it is necessary to place blind screws in the holes where no climbing stones will be installed.


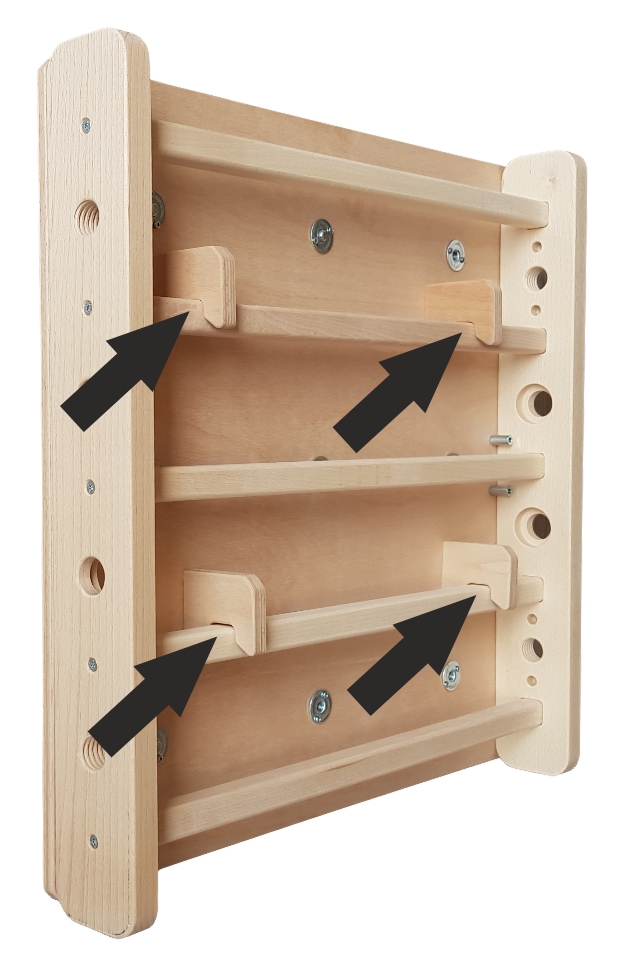
If you want to put the board in a non-standard position and the metal spacing pins interfere with the board  , you can just remove them.
Always make sure that the board hangs on all four hooks and those are fully engaged with the panel rods.
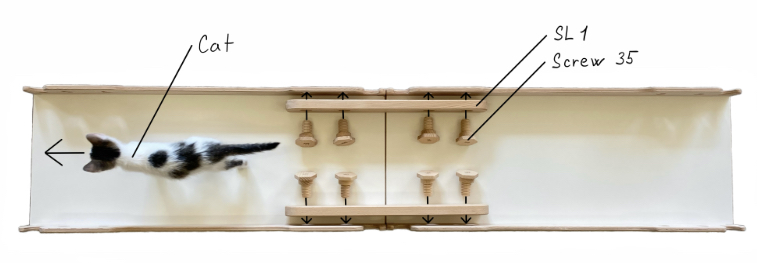
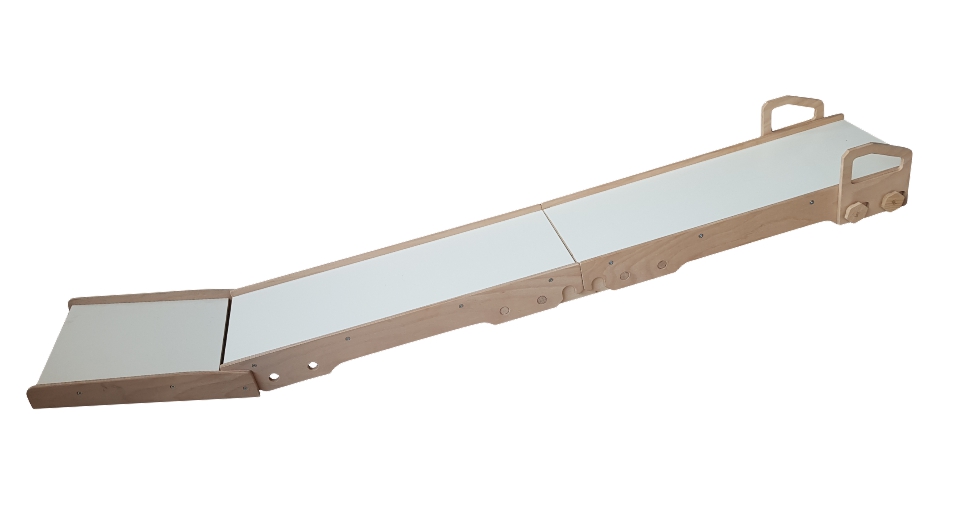
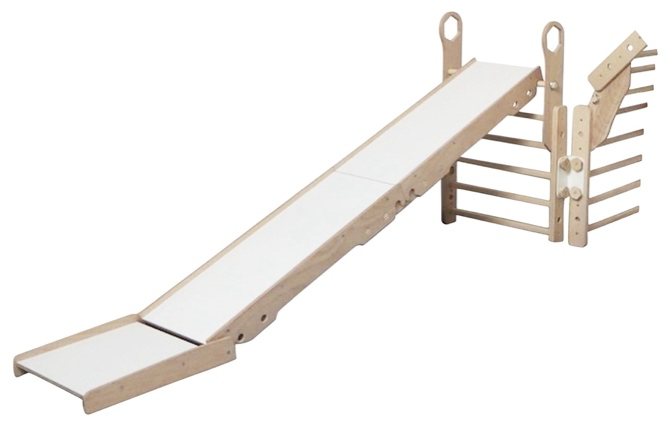
The inclined plane can be also used as a counter, table, bridge or as an inclined surface to exercise with your own weight. The inclined planes can be interconnected, increasing their length. To do so you need 1 x SL1 connector and 8 x bolts 35. You can find out more about the load capacity of the connected inclined planes in the load capacity section.
The inclined plane can be improved with the inclined plane ending  and small M1 handles
 (those are, at the same time, used as a safety feature to avoid potential plane disconnection) or large M2 handles.
The small M1 handles should be turned so that the circular part under the bolt head fits into the circular hole (shown under the letter A). By placing the small M1 handles correctly, you will prevent the inclined plane from being unintentionally pulled out of the panel. The hooks on the handles act as a locking system (shown under the letter B)

Where appropriate and safe, you can hang the balance board. In our product range you can find classic  , or poma balance board
  .
.
Make sure that the structure on which the balance board is installed is stable and that there is no risk of tipping over. The balance board can only be installed by an adult, who then checks the proper installation by testing the balance board himself.
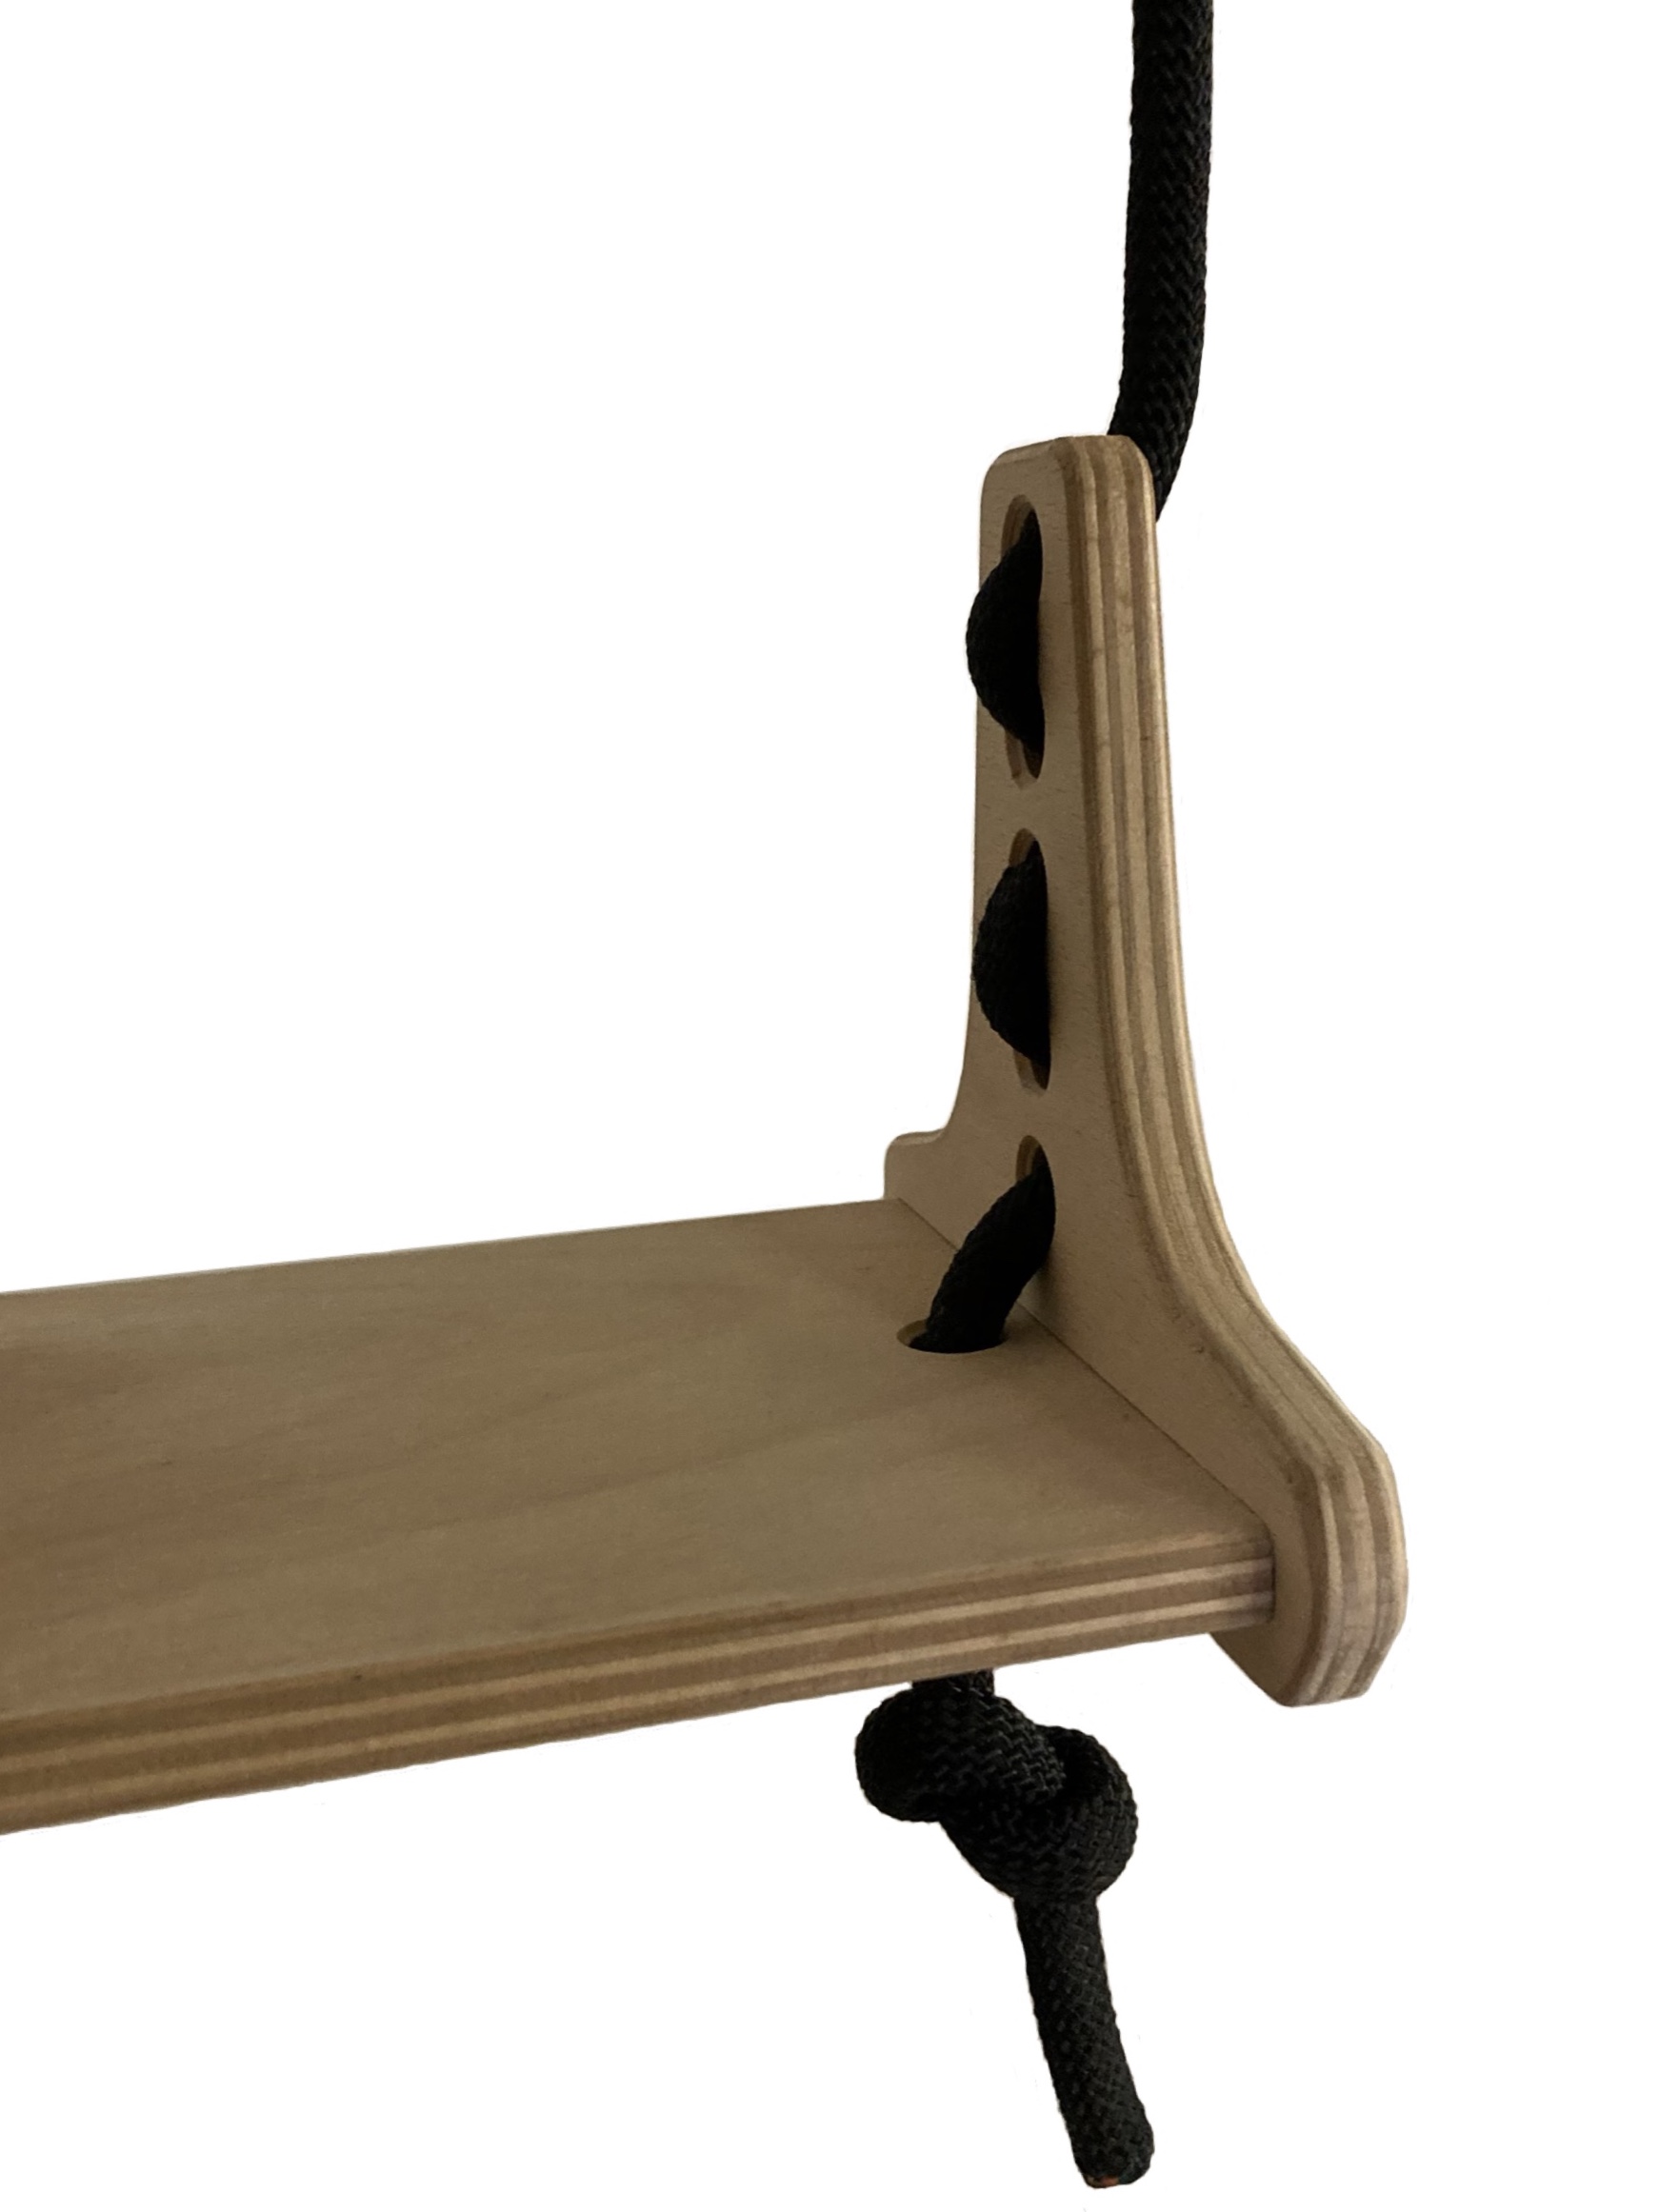
Use only the following knot (clove hitch) to tie the top of the rope behind the bars.

Adjust the length of the rope so the balance board is at least 35 cm above the floor.
Before use, tighten the knot properly and make a simple locking knot on the loose end of the rope:

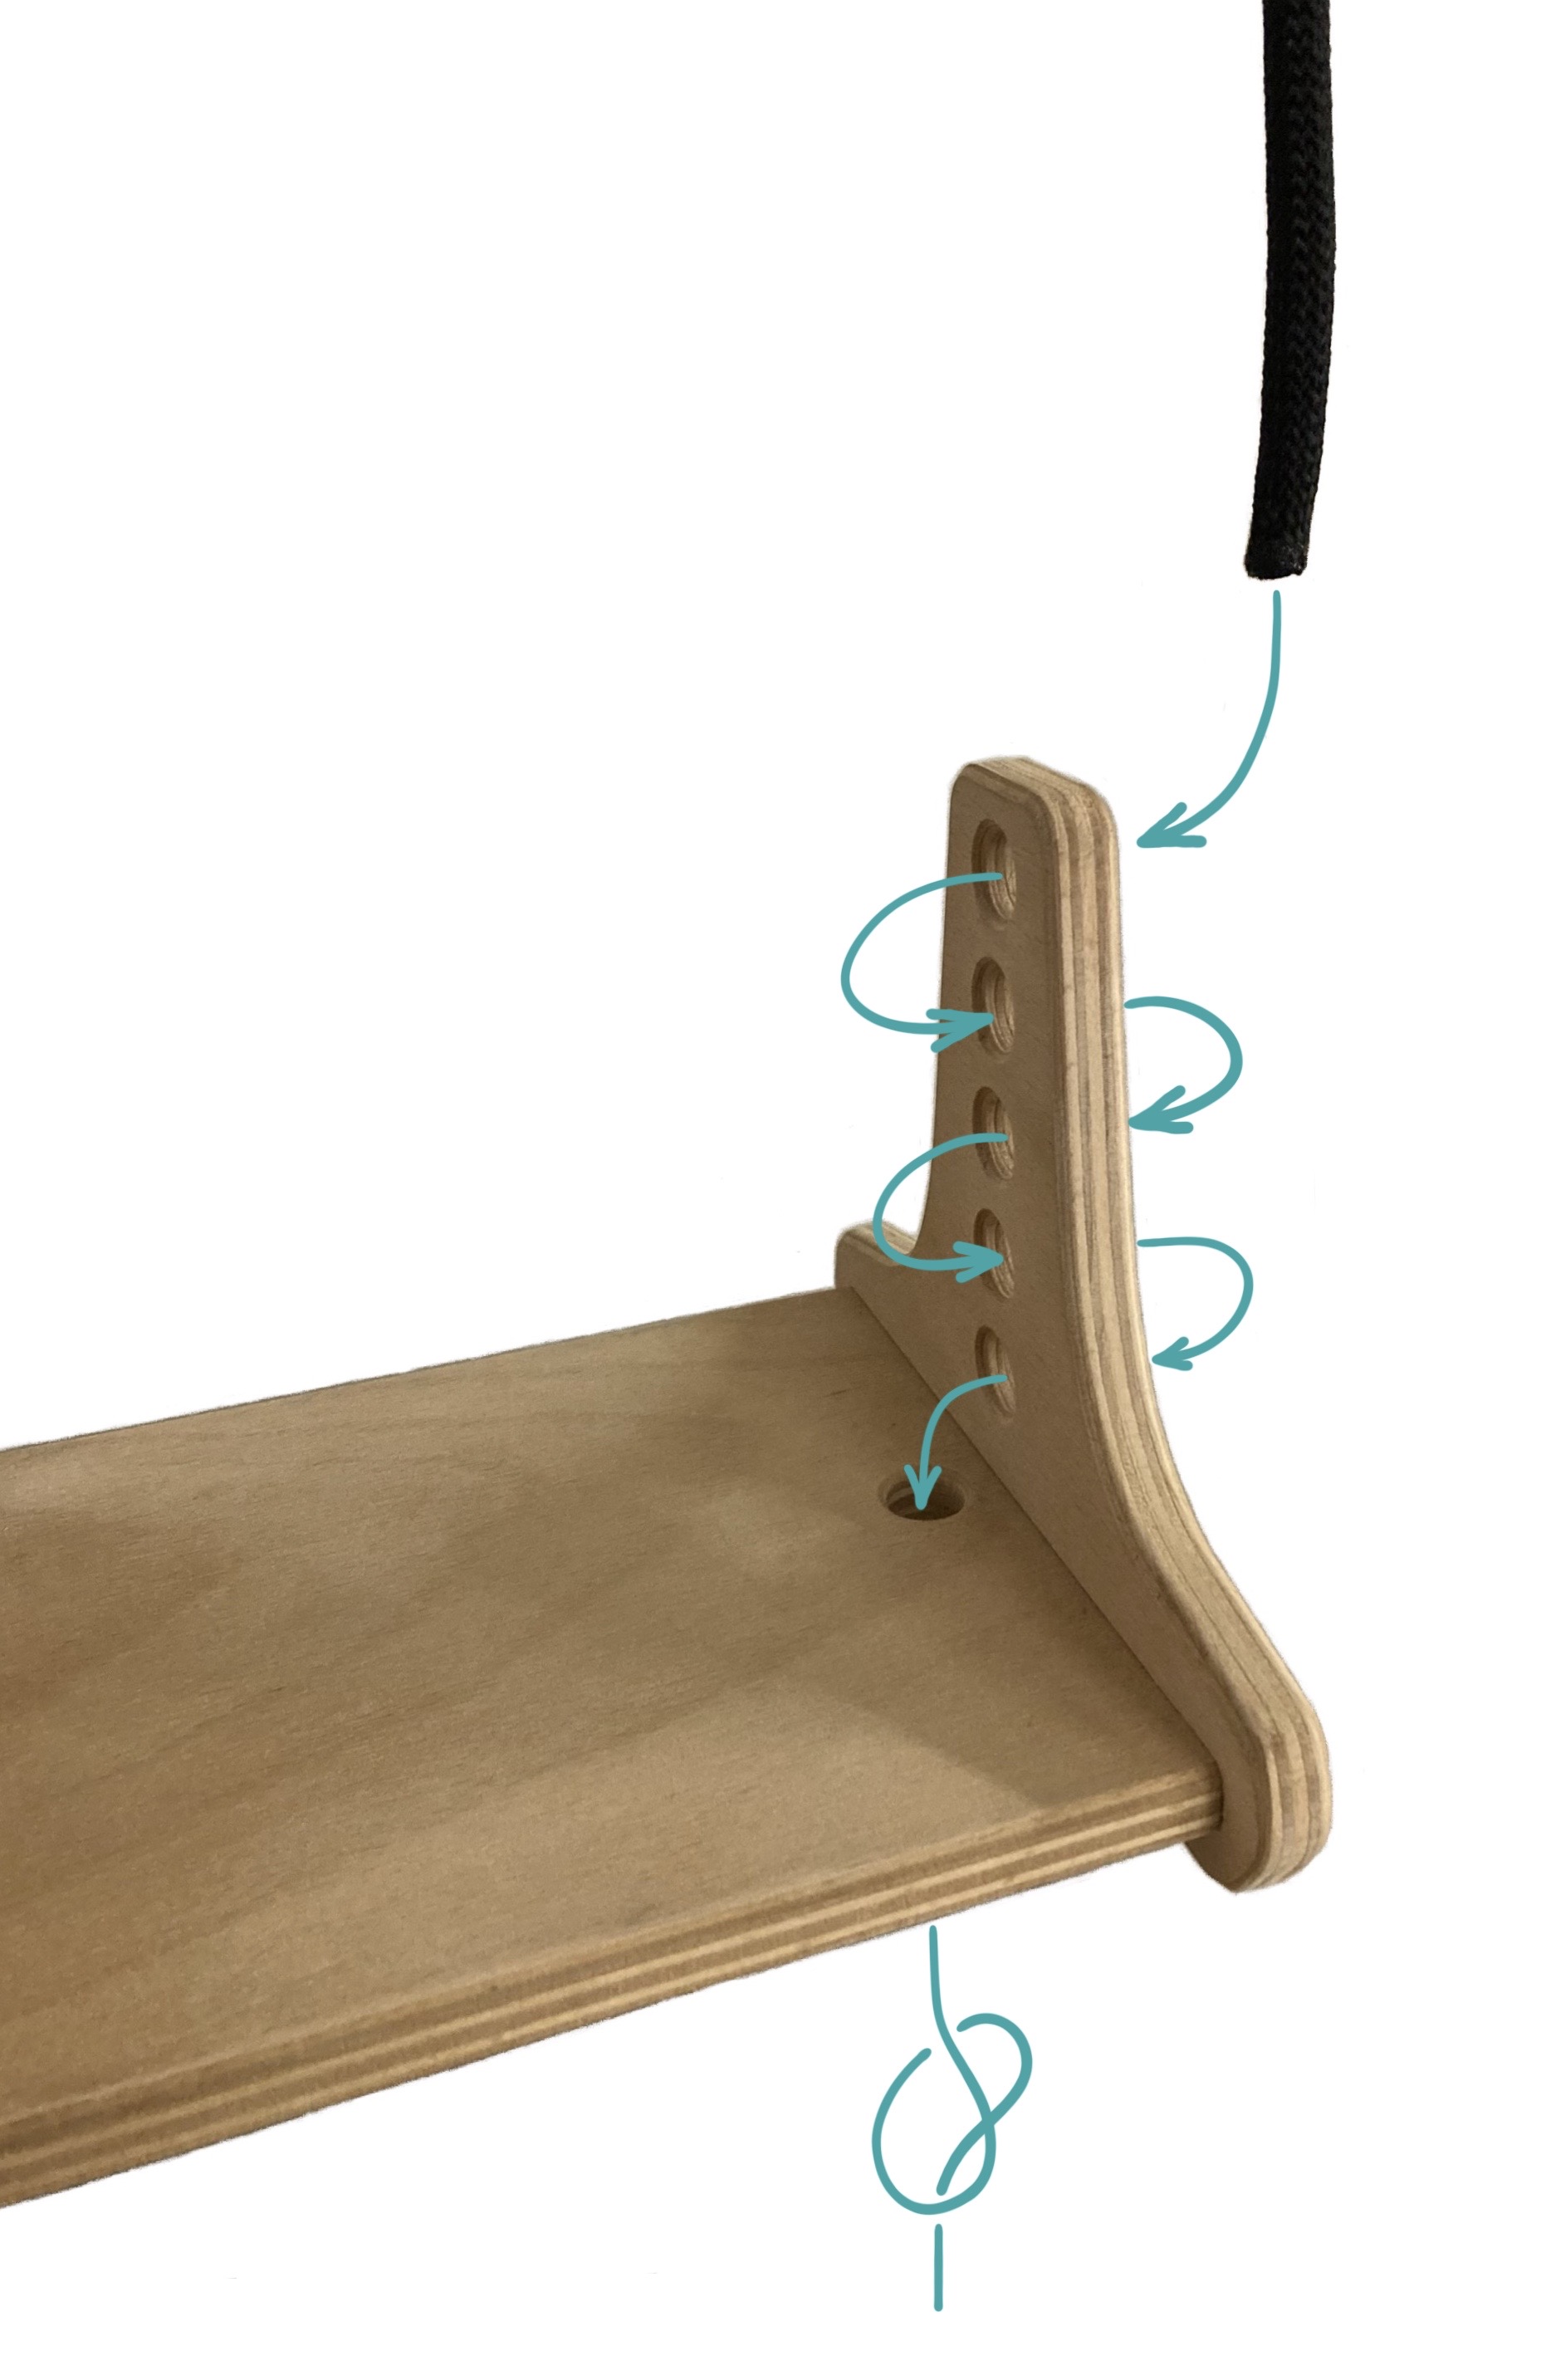
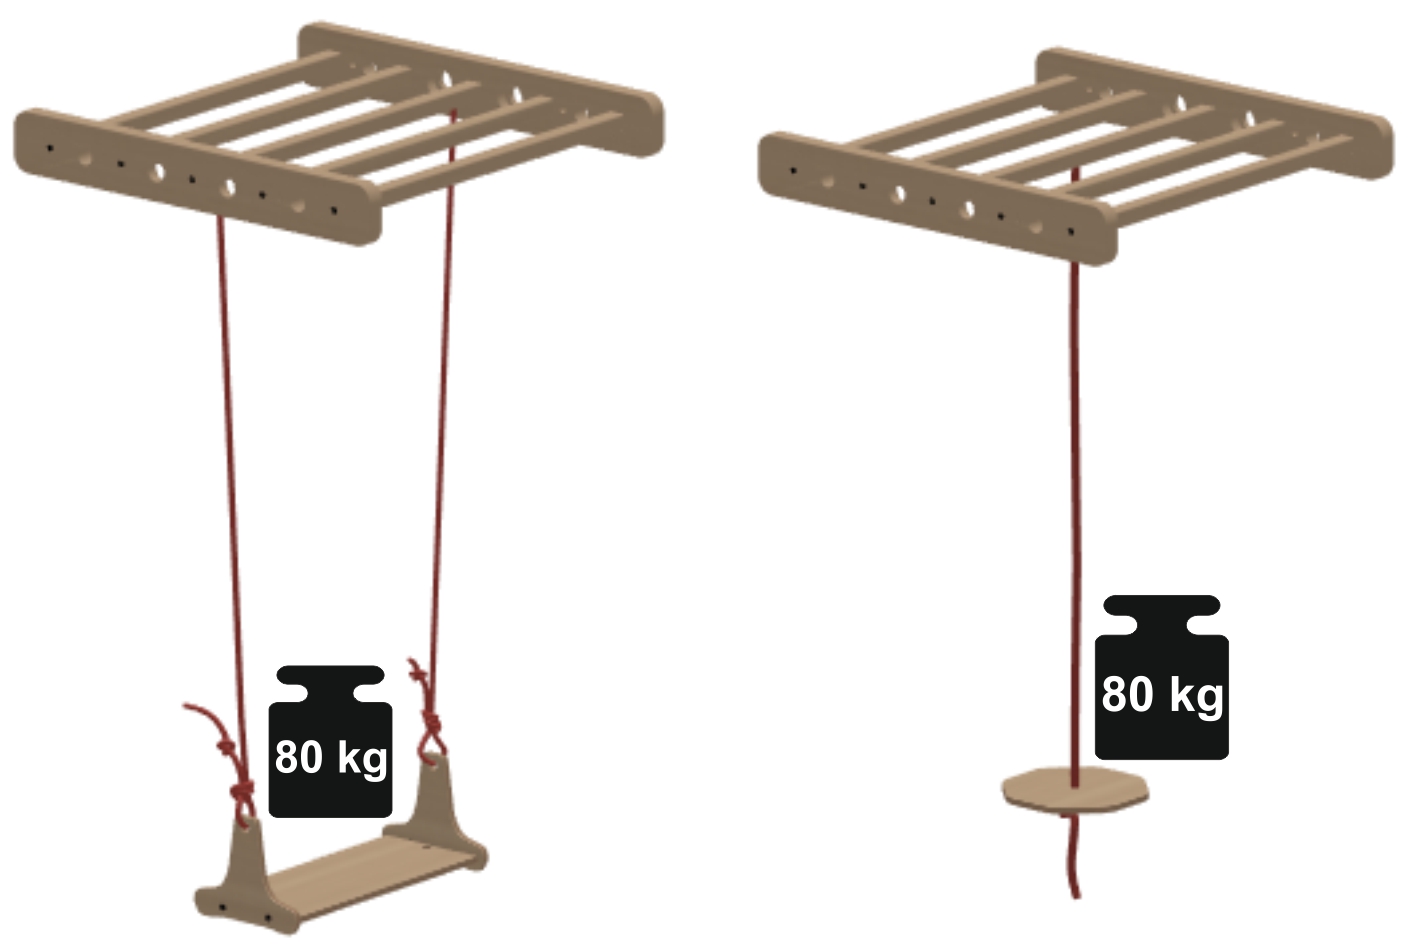
To connect the balance board or gymnastic rings follow the picture below.
The balance board: The principle of five holes also serves as a simple and quick adjustment of the height of the swing. The lower knot only serves as a safety device against pulling out the rope:
The gymnastic rings: pull the rope through connector as shown on the picture and don’t forget to make a simple knot at the end of the rope.

Load bearing capacity and stability
It is recommended to always follow common sense. Each building must be built under the supervision of an adult and also checked and tested. Each building must also carry an adult with an average weight.
The load-bearing capacities of individual basic constructions are described in the instructions.
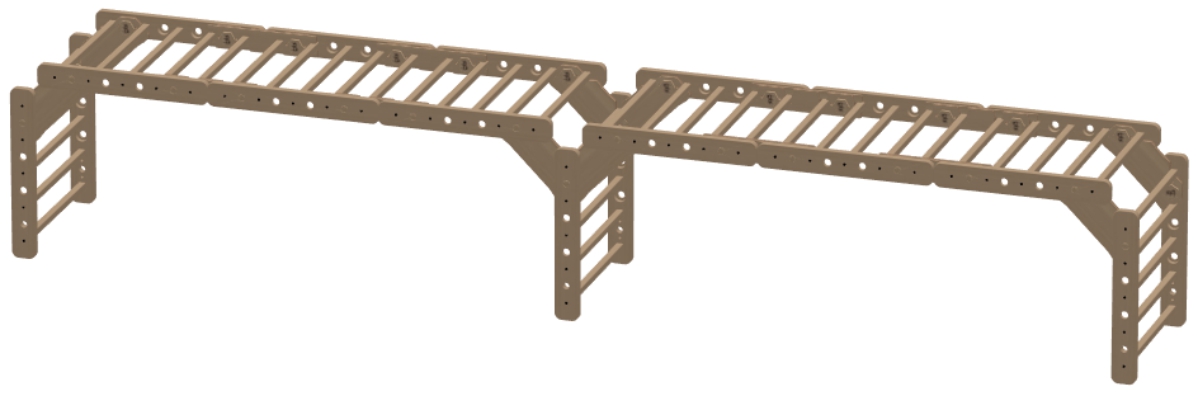
Do not connect more than 3 panels horizontally:
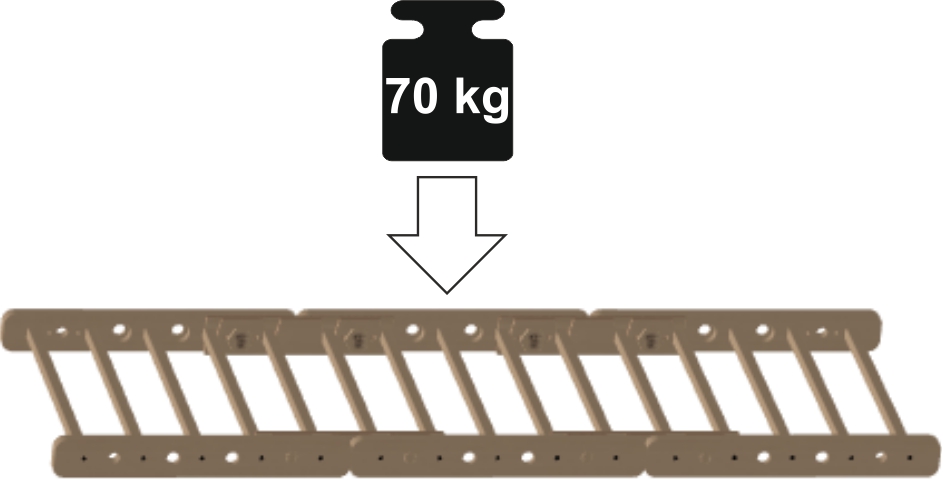
For longer structures, supports shall be provided after every third panel:
Trapeze assembly:


To increase load bearing capacity from 15 kg to 70 kg use H1 braces 

Balance boards load bearing capacities:
Inclined planes load bearing capacities:
Do not connect more than 3 inclined planes. The load capacity is reduced to 70 kg when three inclined planes are connected.
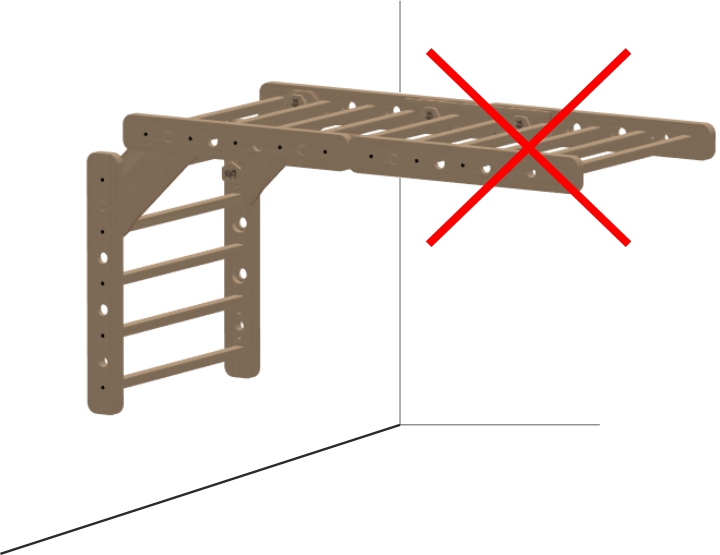
For buildings in open space, it is extremely important to check their stability so that they do not flip over. Especially constructions that are equipped with a balance board or higher than one panel = 60 cm.
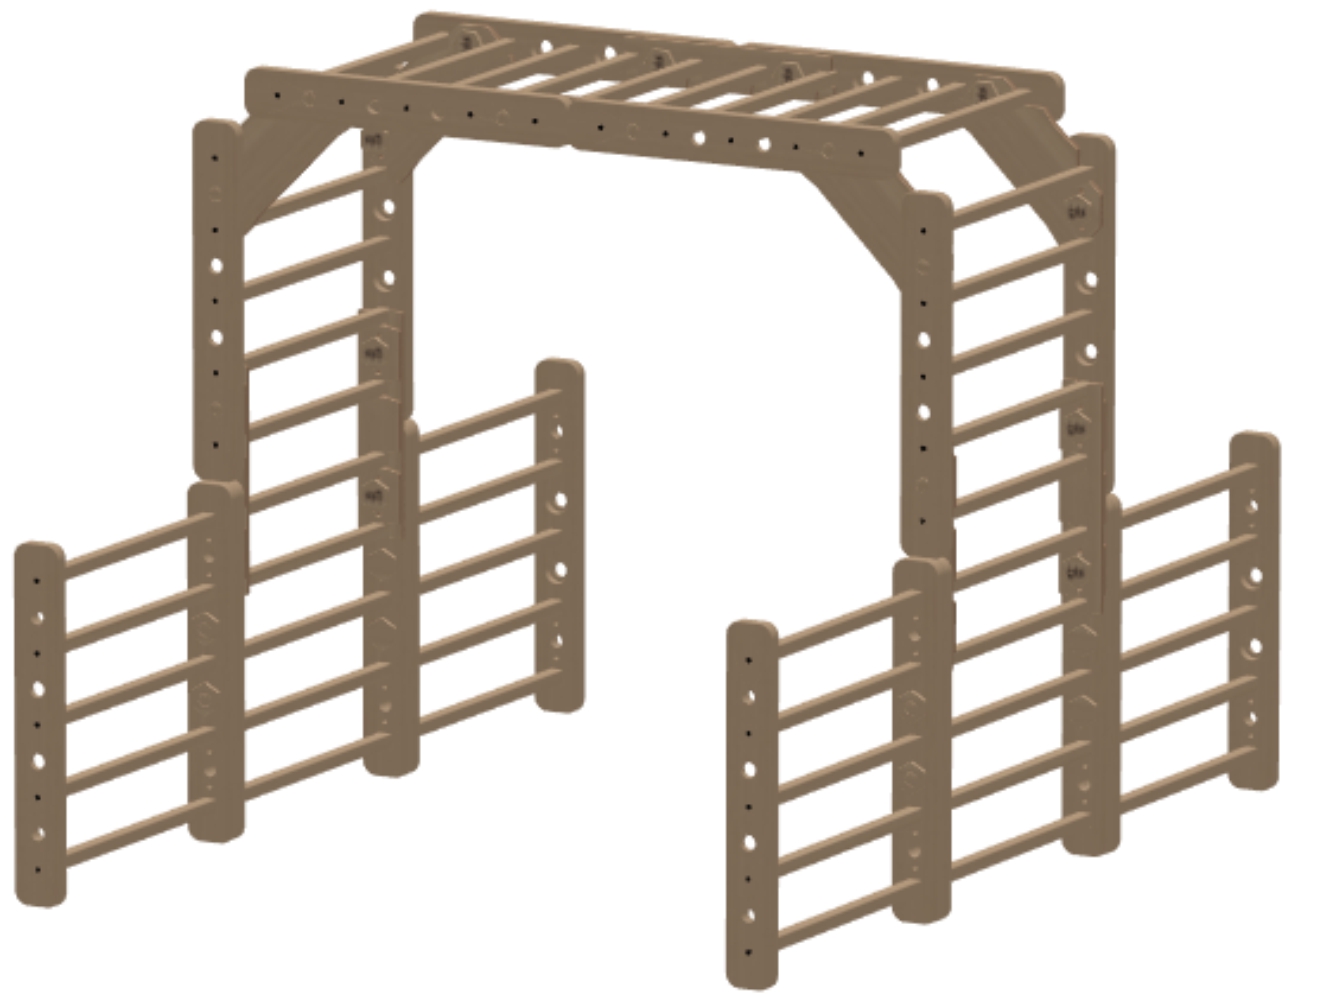
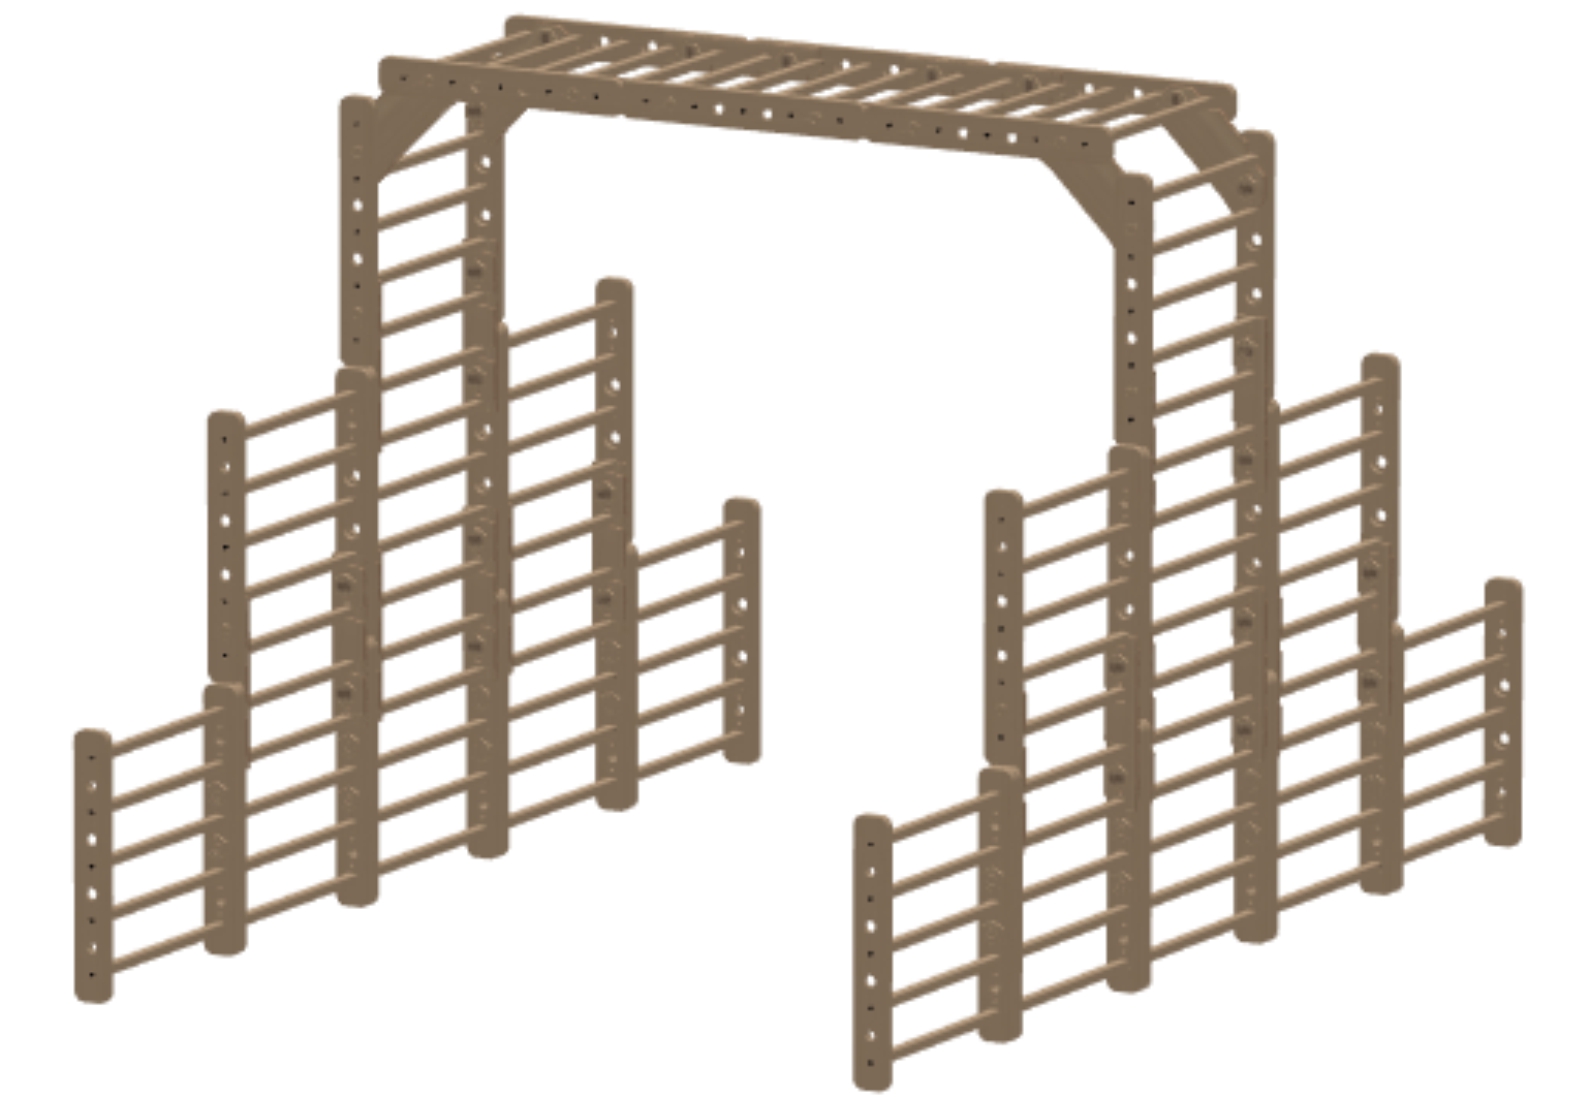
In general following logic should be applied when creating the structure. Structure 1 panel high should be 1 panel wide. Structure 2 panels high should be 3 panels wide. Structure 3 panels high should be 5 panels wide.
Stainless steel bars are also suitable for building expansion.
Examples of properly built structures:
!!! HIGHER CONSTRUCTIONS ARE DANGEROUS, DON'T BUILD THEM !!!
Buildings that do not comply with this rule shall not be fitted with balance board and climbing ropes unless properly anchored to the ground or to the wall.
Safety
The products comply with the standard ČSN-EN 71 for the safety of toys.
Certified, non-toxic materials are used for its production.
Assembly of products is intended for persons over 18 years. In the case where the installation is done by younger person, the continuous supervision is required of the adult, followed by the test of entire building also by an adult - strength of joints, stability of the building, bearing capacity, suspension and installation of accessories, etc.
The use of all Antonie Emma products requires continuous adult supervision.
All fasteners must be fully screwed in and tightened.
The Antonie Emma product or assembly must not be used if any of its parts are damaged (broken, cracked, chipped, etc.)
For safety reasons, Antonie Emma products must be assembled only as presented in its instructions and in the “Get inspired” section on the website www.antonieemma.eu.
Antonie Emma assumes no liability for damage to property, damage to third parties and personal injury caused by the use of Antonie Emma products.
Maintenance
No special maintenance is required for Antonie & Emma products.
In case of common dirt please clean with a damp cloth
.In the event of greater dirt, the parts can be lightly sanded with sandpaper with a grain size of 400 and finer. You can buy such a repair kit  in our eShop.
Surface treatment - Faber climbing frames for outdoor use should be treated only with Antonie Emma oil from our e-shop. In case of not following instructions (e.g. use of not approved oil) any claim will not be accepted.
When should I apply Faber oil?
1) If you plan to use the climbing frame outdoor.
2) If you want the climbing frame to be more dirt resistant.
3) if you want Faber to last not 50, but 150 years.
How to apply oil on Faber climbing frames:
1) Think about how much oil you need. Normally 50 ml of oil is required per panel OR for 10 pcs of different "T" connectors.
2) Do not forget to buy an oil kit in our eShop, where you will find everything you need, including cover paper.
3) Use brush to apply the first layer of oil and spread it thoroughly. Apply oil in all holes, including the threaded holes and make sure that there is no large amount of oil left in these areas (remove excess oil with a tissue, for example). Let the first coat dry in a well-ventilated room at the minimal temperature of 18°C for at least 5 hours before applying the second coat.
4) Apply the second layer in the same way as for the first layer. Allow to dry in a well-ventilated room for 24 hours. The oil will harden completely in the next ten days. We recommend that you wait before you start using oiled climbing frames. However, with precaution , you can use climbing frame 24 hours after the second coat.
5) For a smooth surface, we recommend to sand all parts with the sanding fleece provided in the oil kit.
PLEASE READ CAREFULLY:
Even coated climbing frames Faber with our oil must not come into contact with splashing or running water. Oiled wood is more durable, much more resistant to atmospheric moisture, and oiled parts are easier to clean. Climbing frames Faber, whether oiled or not, must always be kept under the shelter to avoid direct contact with rain water. Make sure that the Climbing frames Faber do not come into contact with water, for example when watering a garden. It is also required to avoid direct contact with snow and to avoid exposure to temperatures below 5 degrees of Celsius.
General information and warnings
The product is designed for a minimum age of 3 years to max. 115 years.
We provide 5-year warranty on manufacturing defects of Antonie Emma products.
Do not expose the product to any source of water incl. moisture.
The product must not come into contact with splashing or running water (rain, watering, showering, etc.)
The product must not be used for purposes other than those intended.
Always use original Antonie Emma parts only.
Under the influence of UV radiation, products can change.